![]()
Page History
...
| Section | ||||||||||||||||||||||||||
|---|---|---|---|---|---|---|---|---|---|---|---|---|---|---|---|---|---|---|---|---|---|---|---|---|---|---|
|


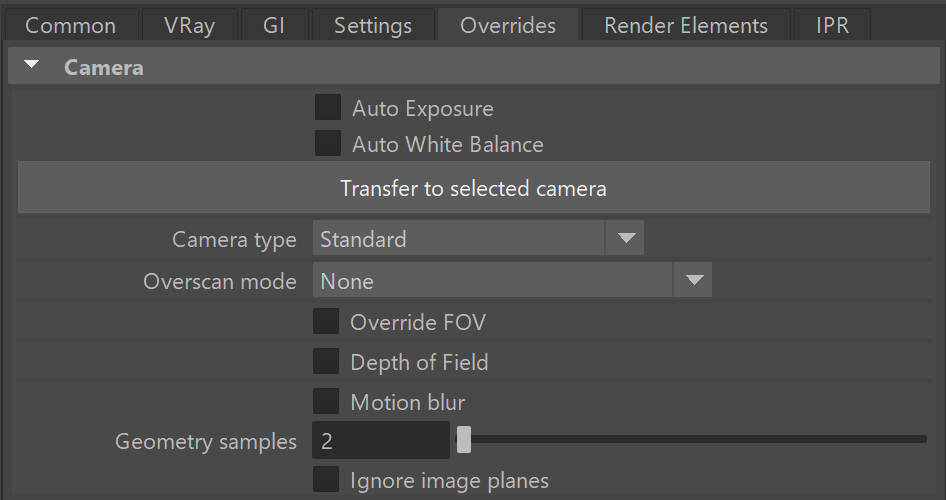
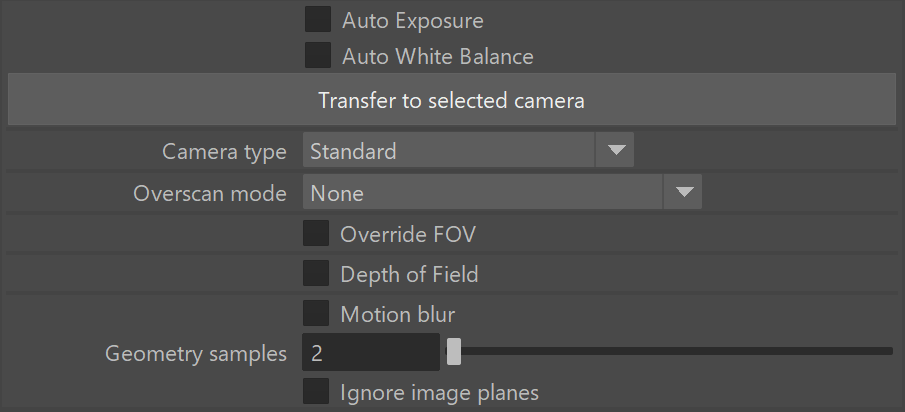
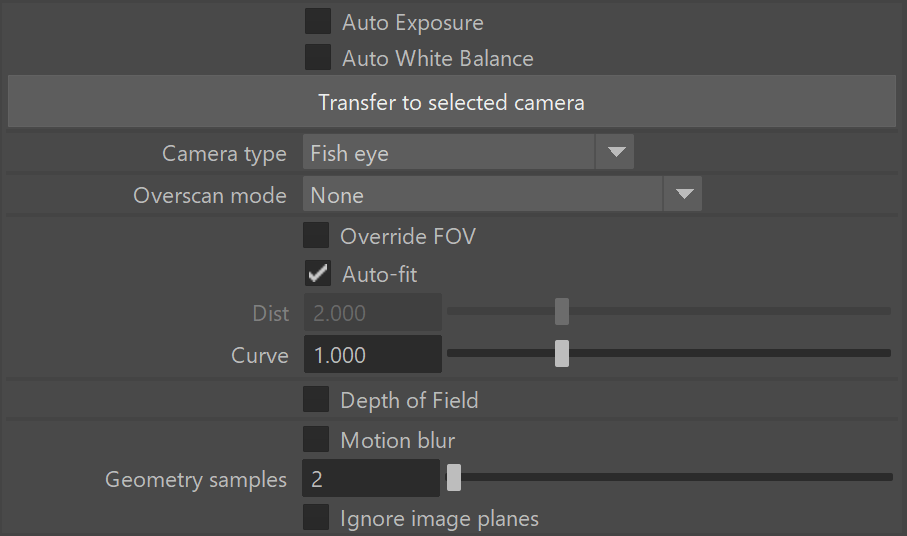
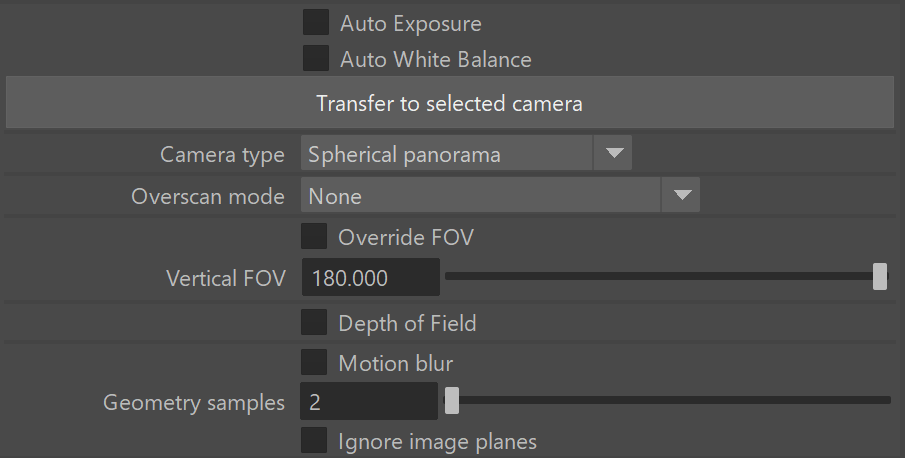
Camera Overrides Parameters
...
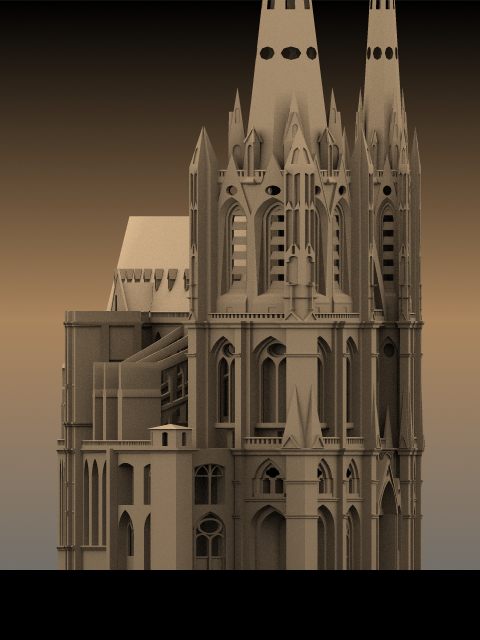
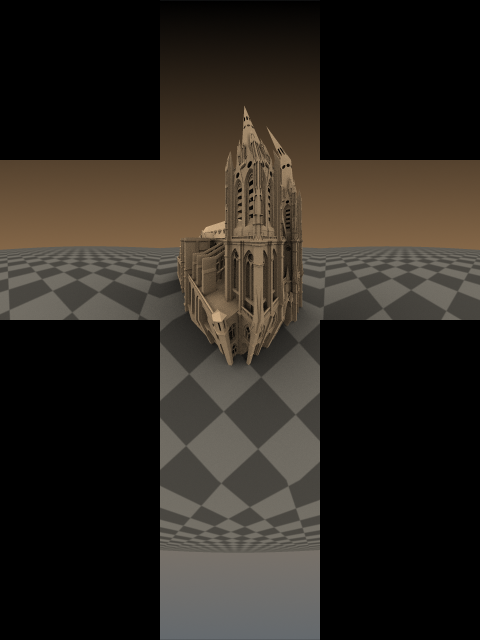
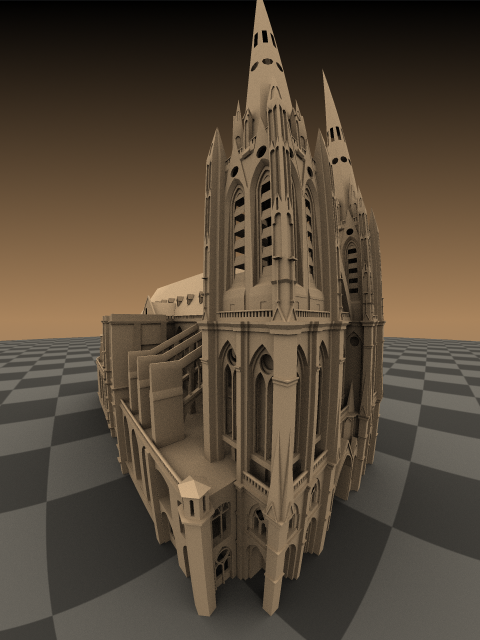
The cameras in V-Ray generally define the rays that are cast into the scene, which essentially is how the scene is then projected onto the viewing screen. V-Ray supports several camera types described below with sample renders in the next section.
| Section | |||||||||||||||||||||||||||||||||||||||||||||||||
|---|---|---|---|---|---|---|---|---|---|---|---|---|---|---|---|---|---|---|---|---|---|---|---|---|---|---|---|---|---|---|---|---|---|---|---|---|---|---|---|---|---|---|---|---|---|---|---|---|---|
|


| Section | ||||||||||||||||||||||||||||||||||||||||||||||||||||
|---|---|---|---|---|---|---|---|---|---|---|---|---|---|---|---|---|---|---|---|---|---|---|---|---|---|---|---|---|---|---|---|---|---|---|---|---|---|---|---|---|---|---|---|---|---|---|---|---|---|---|---|---|
|


| UI Text Box | ||
|---|---|---|
| ||
The parameters in this rollout are ignored if you are rendering using Physical camera Attributes. Exception applies for the overscan, motion blur parameters: prepass samples and geometry samplesOverscan, Geometry samples, Auto Exposure and Auto White Balance. |
...
The images below show the difference between the different camera types used in rendering:
| Section | |||||||||||||||||||||||||||
|---|---|---|---|---|---|---|---|---|---|---|---|---|---|---|---|---|---|---|---|---|---|---|---|---|---|---|---|
|
| Section | |||||||||||||||||||||||||||
|---|---|---|---|---|---|---|---|---|---|---|---|---|---|---|---|---|---|---|---|---|---|---|---|---|---|---|---|
|
...
| Anchor | ||||
|---|---|---|---|---|
|
...
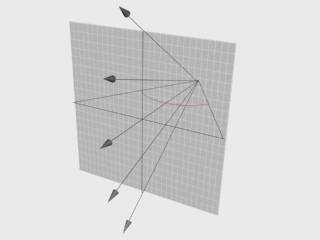
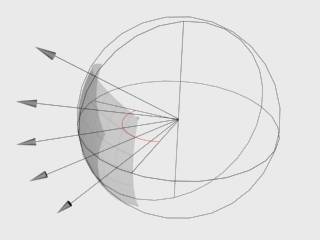
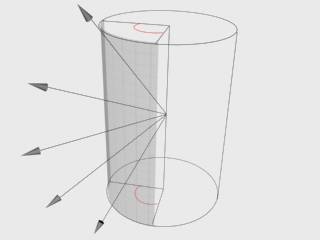
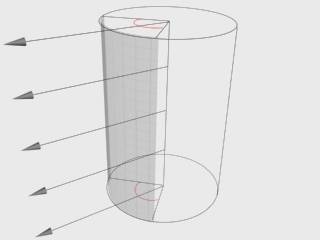
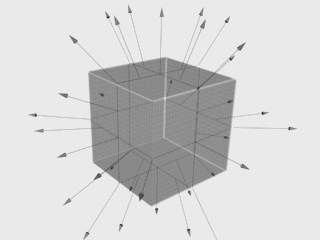
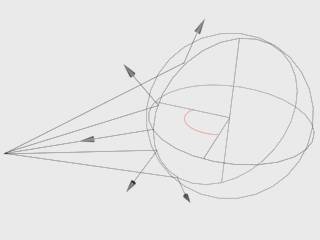
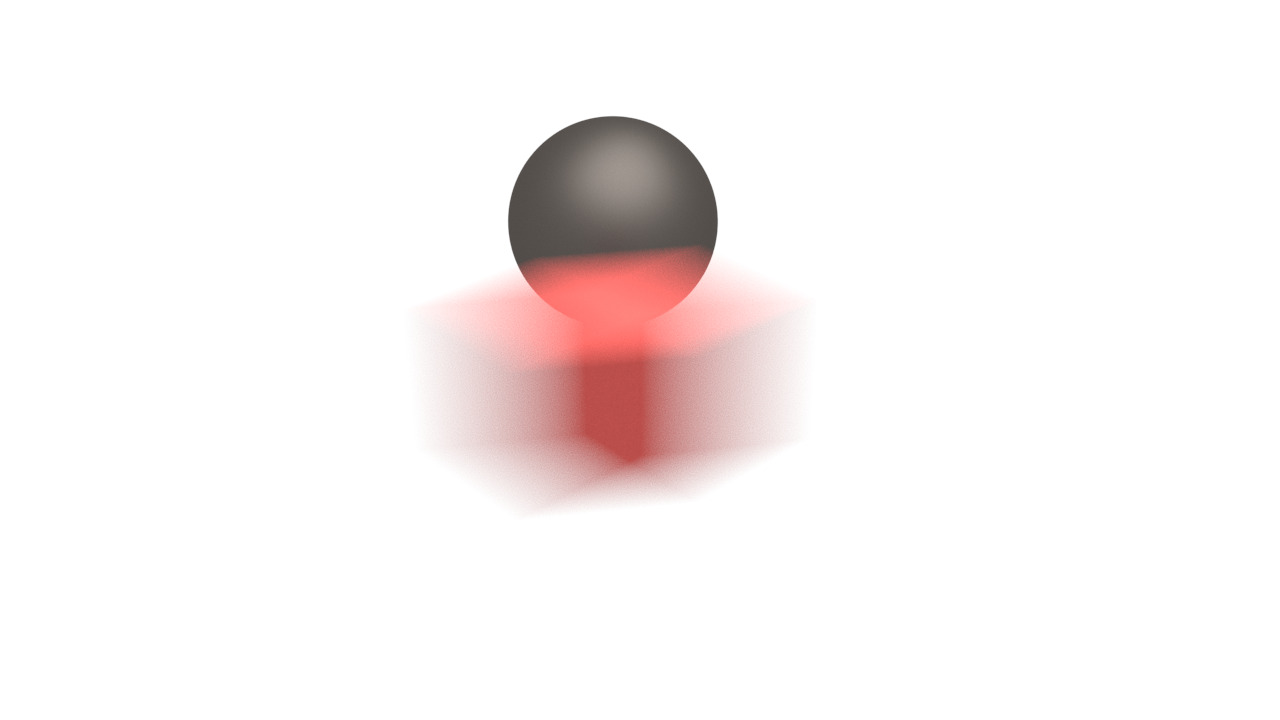
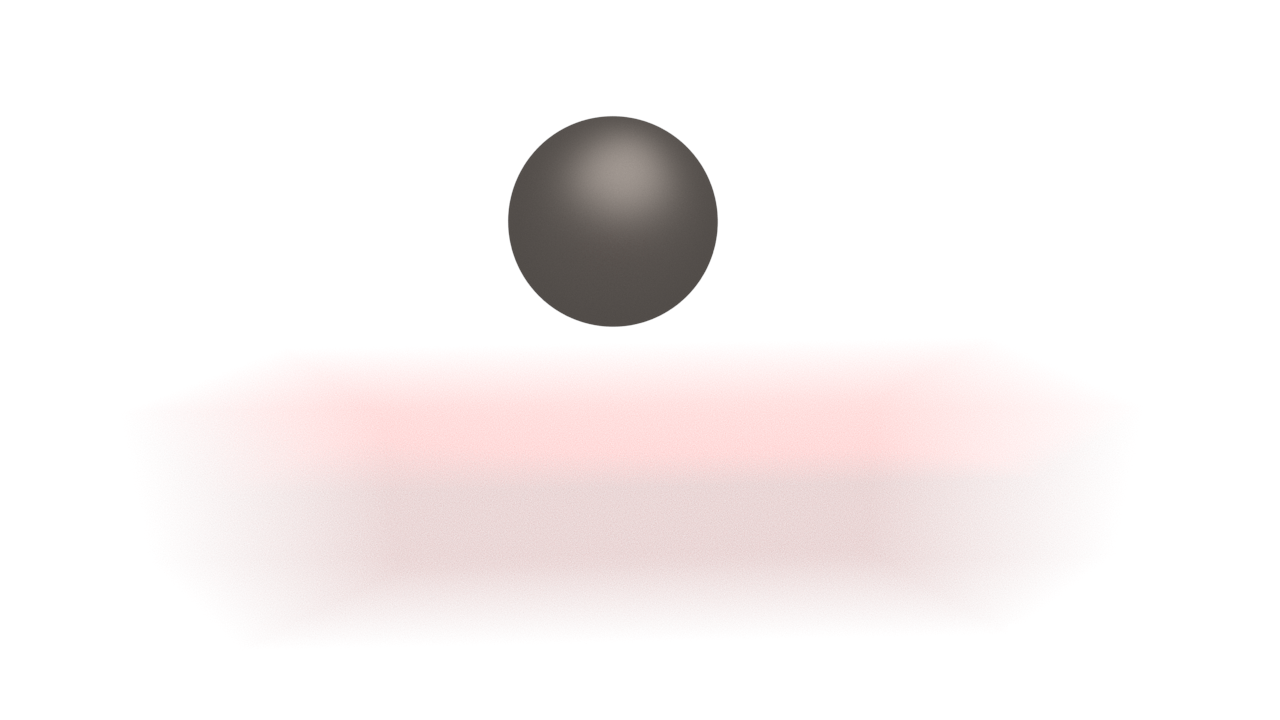
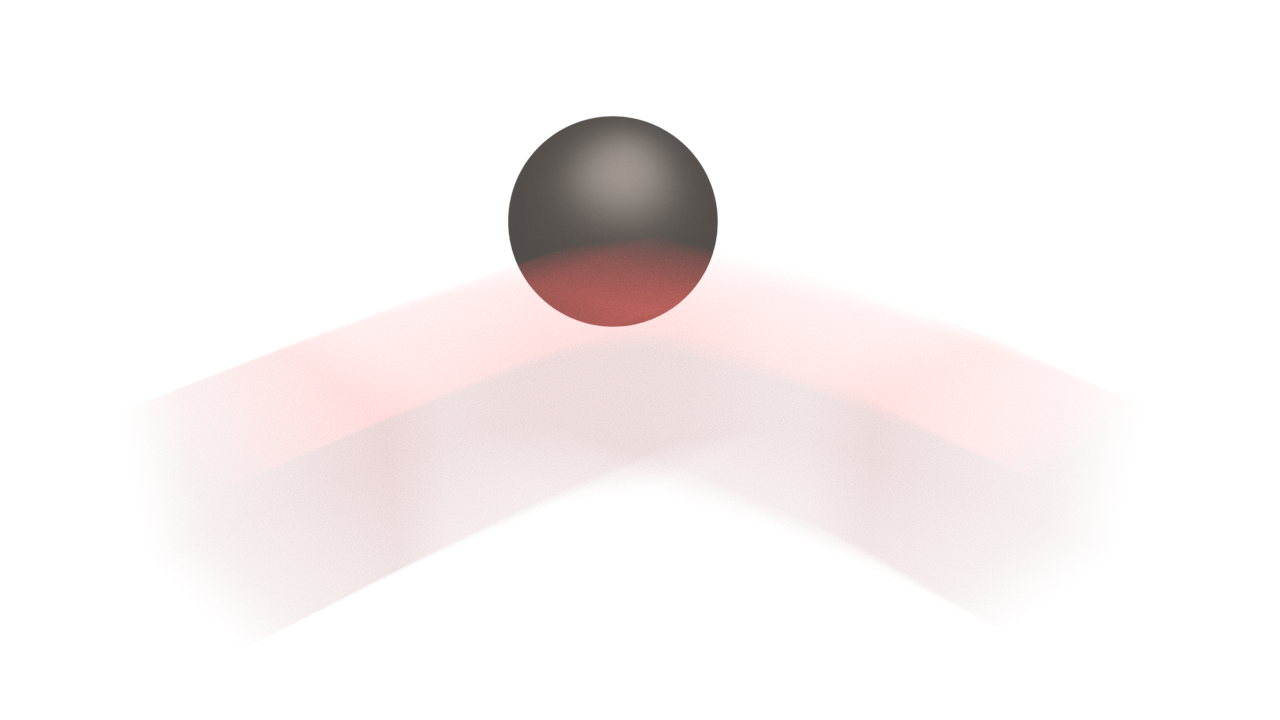
Example: Camera Types Explained
...
This example shows how the rays for different camera types are generated. The red arcs in the diagrams correspond to the FOV angles.
| Section | |||||||||||||||||||||||||||||
|---|---|---|---|---|---|---|---|---|---|---|---|---|---|---|---|---|---|---|---|---|---|---|---|---|---|---|---|---|---|
|
| Section | |||||||||||||||||||||||||||
|---|---|---|---|---|---|---|---|---|---|---|---|---|---|---|---|---|---|---|---|---|---|---|---|---|---|---|---|
|
...
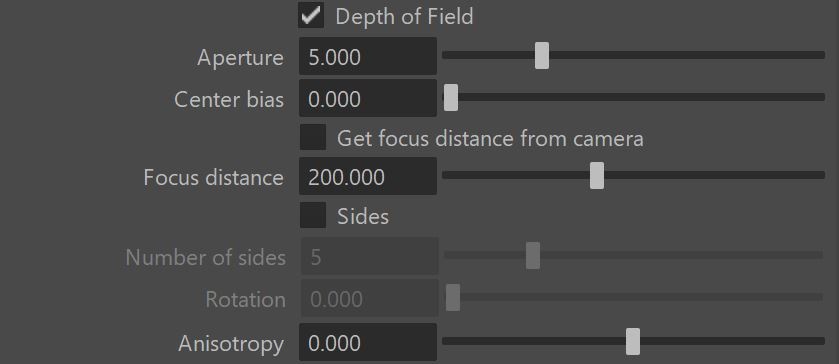
Anchor DepthOfField DepthOfField
...
| Section | |||||||||||||||||||||
|---|---|---|---|---|---|---|---|---|---|---|---|---|---|---|---|---|---|---|---|---|---|
These parameters, which appear when the Depth of Field option is enabled, control the depth of field effect when rendering with a standard Maya camera. The parameters are ignored if you render with Physical camera Attributes.
|
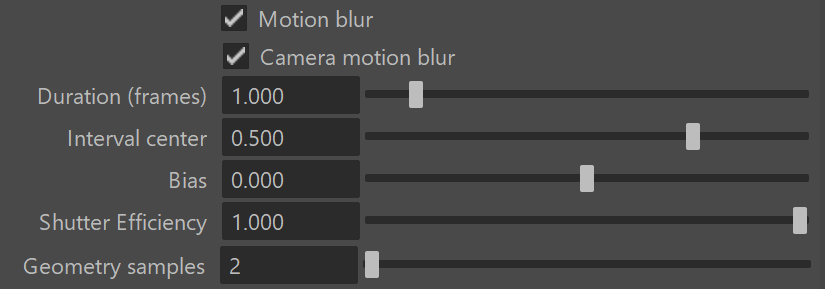
Anchor MB MB
Motion Blur Parameters
...
| Section | ||||||||||||||||
|---|---|---|---|---|---|---|---|---|---|---|---|---|---|---|---|---|
These parameters, which appear when the Motion Blur option is enabled, set values for calculations of the Motion Blur effect. For more information, see the Motion Blur example below.
|

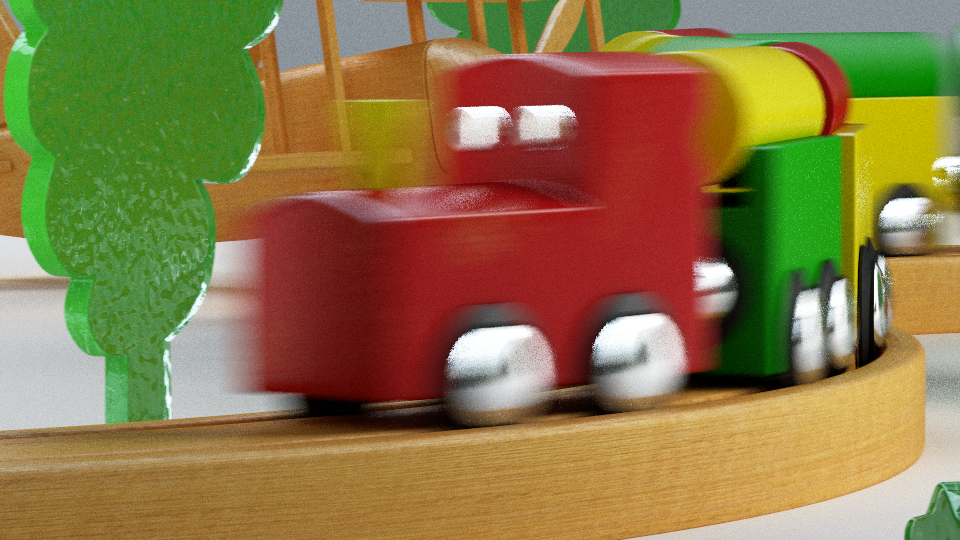
Anchor motionBlur motionBlur
...
This example demonstrates how motion blur works.
| Section | |||||||||||||||||||||
|---|---|---|---|---|---|---|---|---|---|---|---|---|---|---|---|---|---|---|---|---|---|
|

| Anchor | ||||
|---|---|---|---|---|
|
...
Example: Duration
...
The following scene consists of three-frame animation of a moving cube. The cube's position on each frame:
Frame 0: Left side
Frame 1: Near box
Frame 2: Right side
...
The following images show frame 1 rendered with different duration values:
...
| Section | |||||||||||||||||||||
|---|---|---|---|---|---|---|---|---|---|---|---|---|---|---|---|---|---|---|---|---|---|
|
| Anchor | ||||
|---|---|---|---|---|
|
...
Example: Interval Center
This example demonstrates the effect of the interval center parameter. The scene is a moving sphere. Here are three sequential frames without motion blur:


Here is the middle frame, rendered with motion blur and three different values for the interval center; the motion blur duration is one frame.

Interval center = 0.0; the middle of the motion blur interval matches the sphere position at the second frame

Interval center = 0.5; the middle of the interval is halfway between the second and the third frame

Interval center = 1.0; the middle of the interval matches the sphere position at the third frame

Interval center = 4; the middle of the interval matches the sphere position at the sixth frame

Interval center = 8; the middle of the interval matches the sphere position at the twelfth frame
| Anchor | ||||
|---|---|---|---|---|
|
...
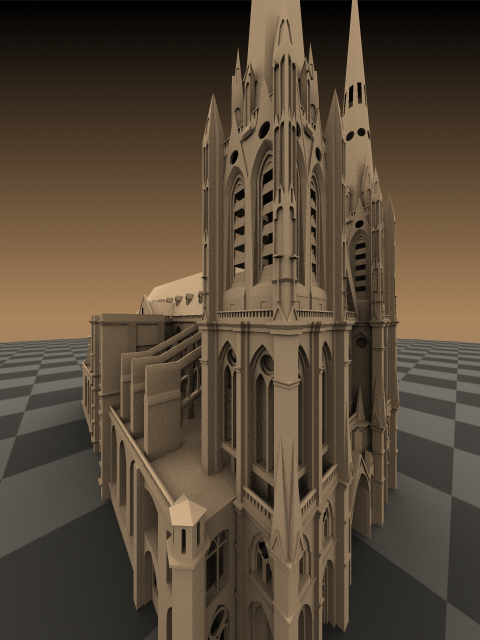
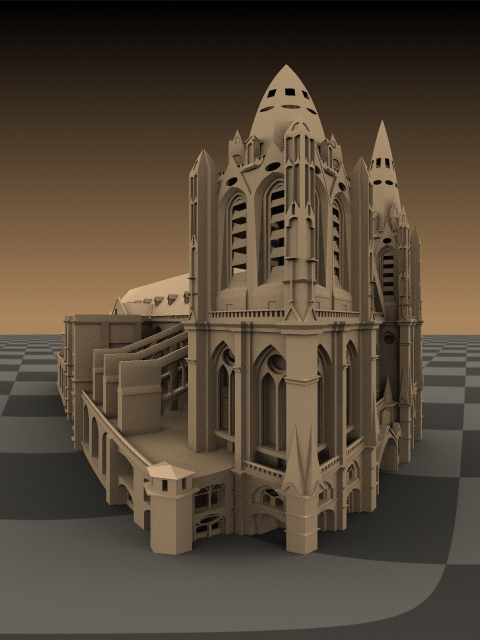
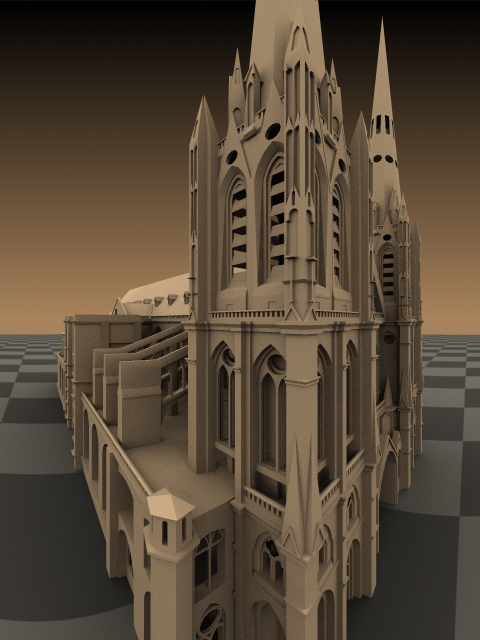
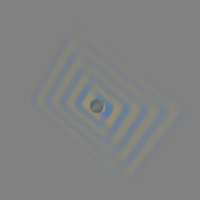
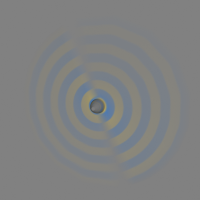
Example: Geometry Samples
The following images demonstrate the Geometry samples parameter using the scene from the Duration example. In all the following renderings, the Duration (frames) parameter is set to 2. All other parameters are the same as for the previous images. The higher the value for Geometry samples, the more accurate the estimated object motion. However, excessive increase of this value will result in long rendering times.
| Section | |||||||||||||||||||||||
|---|---|---|---|---|---|---|---|---|---|---|---|---|---|---|---|---|---|---|---|---|---|---|---|
|

| Section | ||||||||||||||||||||
|---|---|---|---|---|---|---|---|---|---|---|---|---|---|---|---|---|---|---|---|---|
|

Notes
...
The number of geometry samples can be controlled on a per-object basis on the Object Properties dialog. This is useful if you need a lot of samples for some objects in the scene (for example, the wheels of a moving car) while other objects can do with fewer samples (such as the car body). Using more samples only where needed saves memory and speeds rendering.
...