![]()
Page History
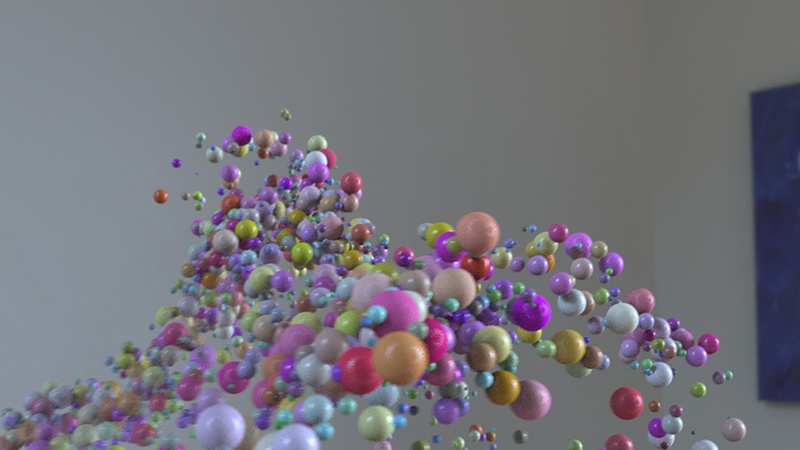
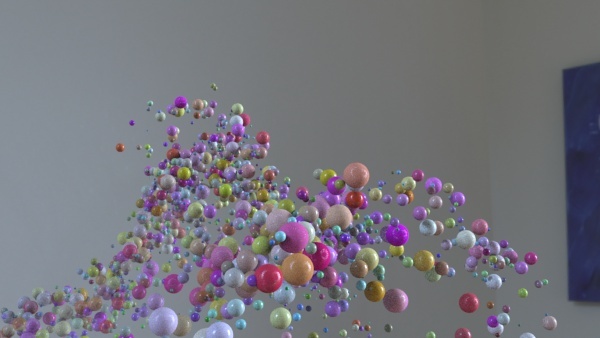
This page contains chapter 2 of the Houdini to 3ds Max Alembic Workflow tutorial, covering the export of Particles.
Overview
...
| Section | ||||||||||||||||||||||||||
|---|---|---|---|---|---|---|---|---|---|---|---|---|---|---|---|---|---|---|---|---|---|---|---|---|---|---|
|
...
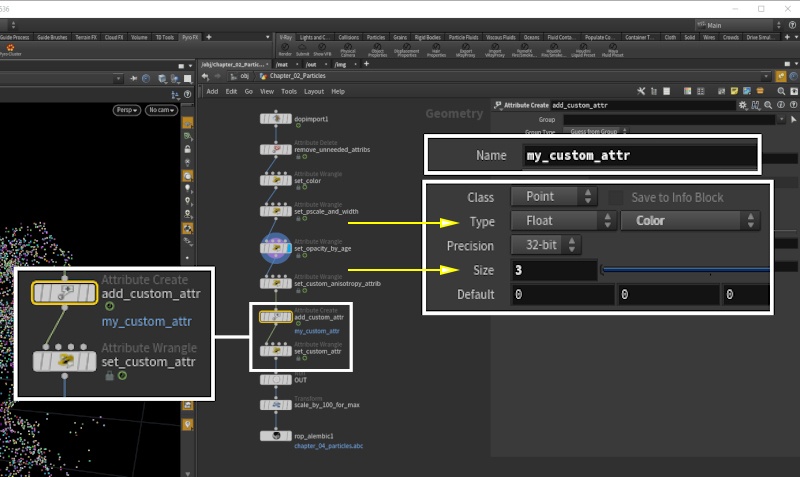
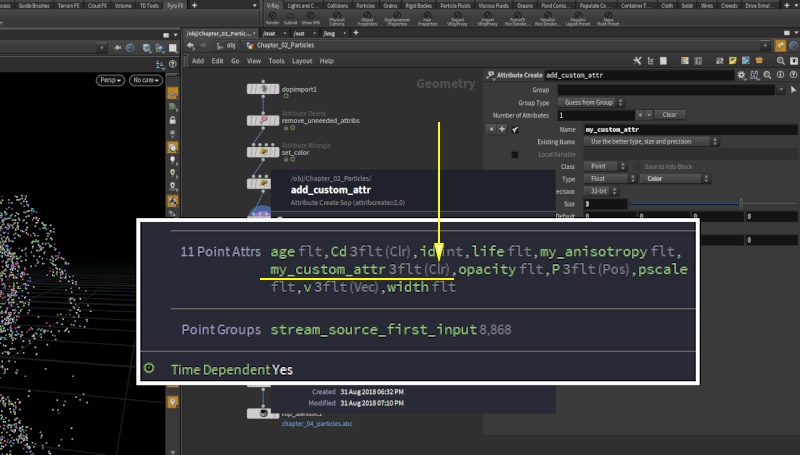
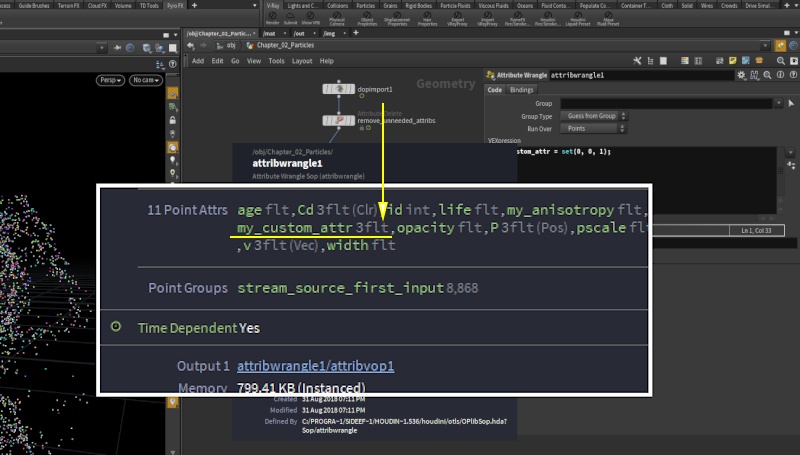
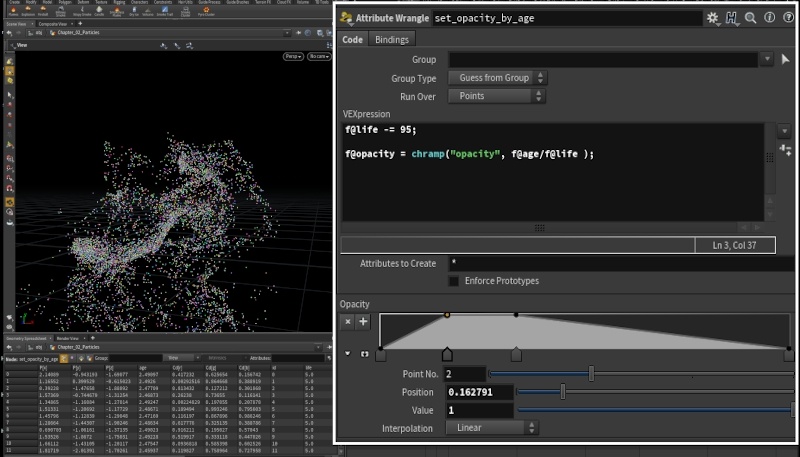
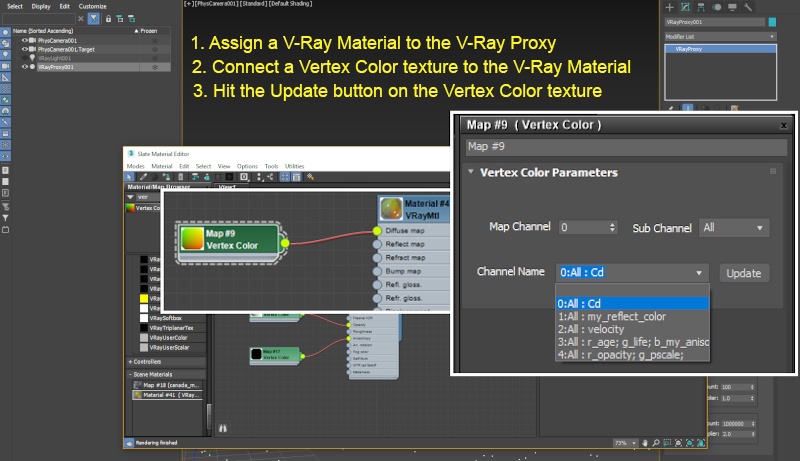
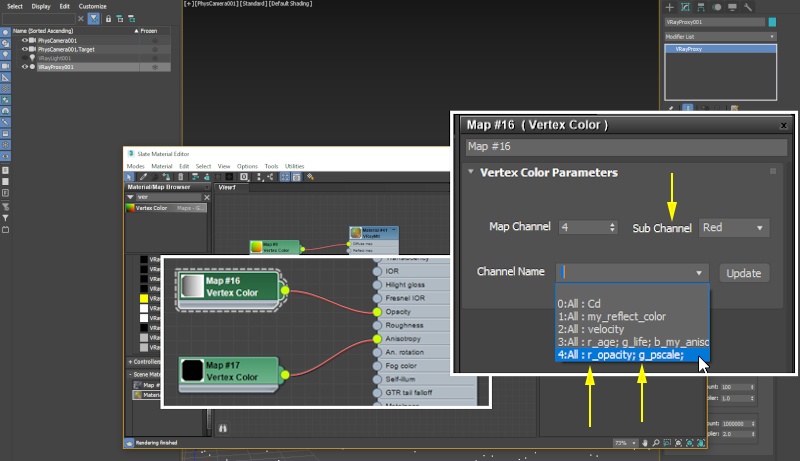
Create and Export Custom Attributes
...
...
| Section | ||||||||||
|---|---|---|---|---|---|---|---|---|---|---|
|
...
| Section | ||||||||||
|---|---|---|---|---|---|---|---|---|---|---|
|
...
...
| Section | ||||||||||
|---|---|---|---|---|---|---|---|---|---|---|
|
...
| Section | ||||||||||
|---|---|---|---|---|---|---|---|---|---|---|
|
...
...
| Section | ||||||||||
|---|---|---|---|---|---|---|---|---|---|---|
|
...
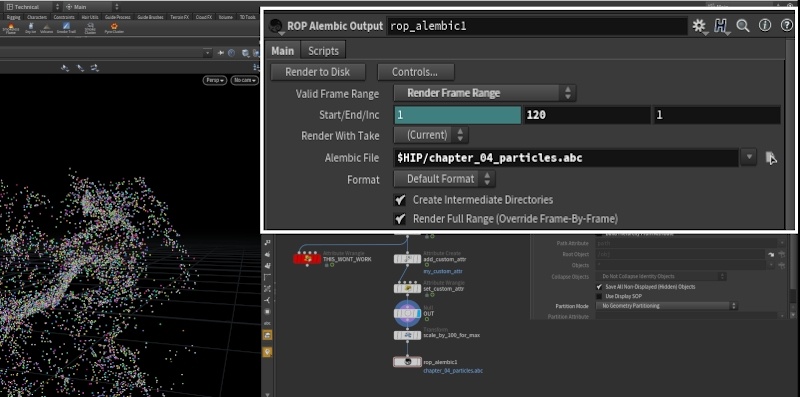
Import into 3Ds Max
...
...
| Section | ||||||||||
|---|---|---|---|---|---|---|---|---|---|---|
|
...
...
| Section | ||||||||||
|---|---|---|---|---|---|---|---|---|---|---|
|
...
...
| Section | |||||||||||||||||||||||||||||
|---|---|---|---|---|---|---|---|---|---|---|---|---|---|---|---|---|---|---|---|---|---|---|---|---|---|---|---|---|---|
|

...
| Section | ||||||||||||||||
|---|---|---|---|---|---|---|---|---|---|---|---|---|---|---|---|---|
|
...
Setup for Float Attributes
...
...
| Section | ||||||||||
|---|---|---|---|---|---|---|---|---|---|---|
|
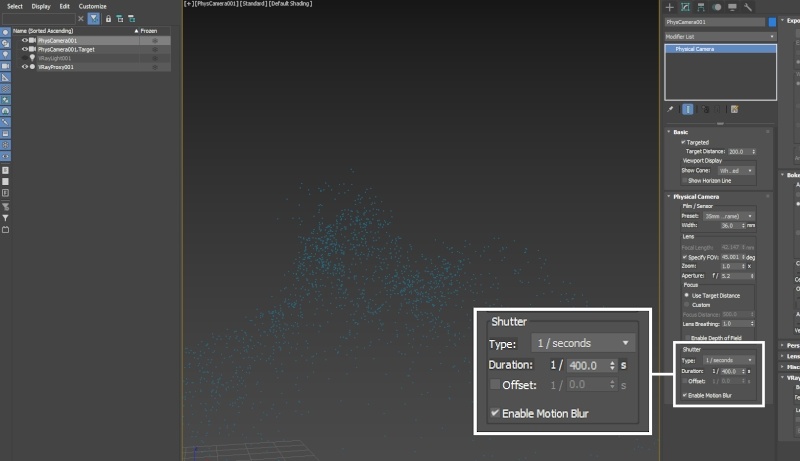
Motion Blur
...
...
| Section | |||||||||||||||
|---|---|---|---|---|---|---|---|---|---|---|---|---|---|---|---|
|
Footnotes
...
| Anchor | ||||
|---|---|---|---|---|
|