This page provides information on the V-Ray Sun and Sky system.
Overview
The V-Ray Sun and V-Ray Sky are special features which are provided by the V-Ray renderer. Developed to work together, they reproduce the real-life sun and sky environment of the Earth. Both are coded so that they change their appearance depending on the direction of the V-Ray Sun.
The V-Ray Sun and Sky systems are based largely on the SIGGRAPH 1999 paper, A Practical Analytic Model for Daylight. For a more complete list of references, please see the References section.
Parameters
Enabled – Turns the light on and off.

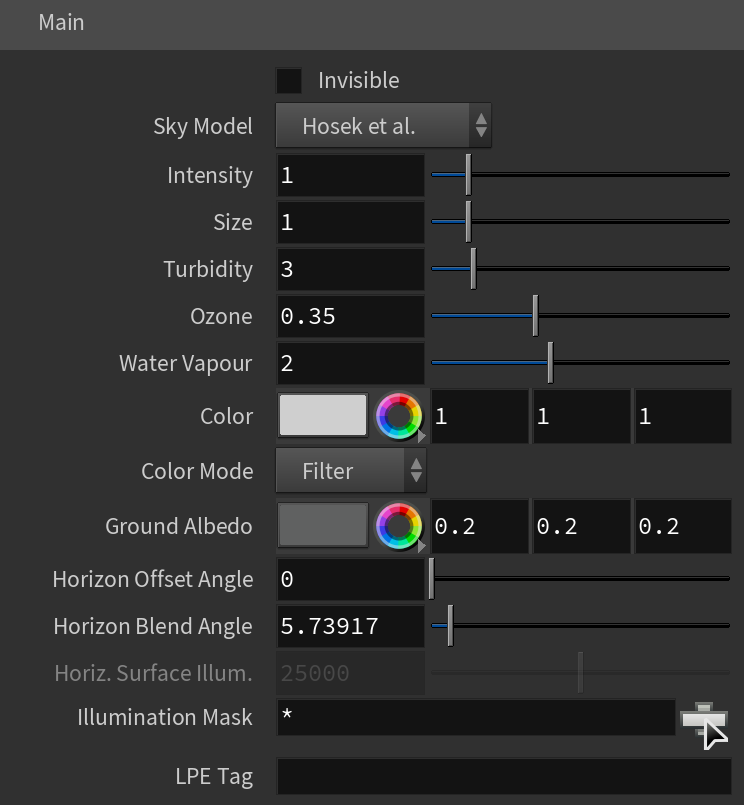
Main
Enabled – Turns the light on and off.
Invisible – Controls whether the shape of the Sun Light source is visible in the resulting render. When disabled, the source light is rendered in the current light color, otherwise the light source itself is not visible in the scene.
Note: This parameter only affects the visibility of the light when seen directly by the camera or through refractions. The visibility of the light with respect to reflections is controlled by the Affect Specular and Affect Reflections options.
Sky Model – Determines the procedural model used to generate the V-Ray Sky texture:
Preetham et al. – The V-Ray Sky procedural texture is generated based on the Preetham et al. method.
CIE Clear – The V-Ray Sky procedural texture is generated based on the CIE method for a clear sky.
CIE Overcast – The V-Ray Sky procedural texture is generated based on the CIE method for a cloudy sky.
Hosek et al – The V-Ray Sky procedural texture is generated based on the Hosek et al. method.
PRG Clear Sky – The V-Ray Sky procedural texture is generated based on the PRG Clear Sky method which has enhanced sunrise and sunset sky.
Intensity – Specifies the brightness of the sun. Since the sun is very bright by default, you can use this parameter to reduce its effect. See the Notes section for more information. For more information, see the Intensity Multiplier example below.
Size – Controls the visible size of the sun. This affects the appearance of the sun disc as seen by the camera and reflections, as well as the blurriness of the sun shadows. For more information, see the Size Multiplier example below.
Turbidity – Determines the amount of dust in the air, which in turn affects the color of the sun and sky. Smaller values produce a clear, blue sky and sun similar to what is seen in rural areas, while larger values make the sun and sky more yellow and orange as seen in a big city. For more information, see the Turbidity example below.
Ozone – Affects the color of the sun light. Available in the range between 0.0 and 1.0. Smaller values make the sunlight more yellow, while larger values make it more blue. For more information, see the Ozone example below.
Water Vapour – Controls the amount of water vapor in the atmosphere which affects the sky color .
Color – Shifts the hue of the V-Ray Sun and Sky system towards the specified color.
Color Mode – Specifies how the Filter Color affects the color of the Sun:
Filter – Shifts the hue of the V-Ray Sun and Sky system towards the color specified in the Filter Color field.
Direct – Sets the color of the V-Ray Sun to match the color in the Filter Color parameter. In this case the intensity of the light does not depend on the V-Ray Sun's position in the sky and is controlled through the intensity multiplier.
Override – Sets the color of the V-Ray Sun to match the color in the Filter Color parameter but the intensity of the light still depends on the V-Ray Sun's position in the sky.
Ground Albedo – Sets the color of the V-Ray Sun and Sky system's ground.
Horizon Offset Angle – Allows the user to manually lower the horizon line.
Horizon Blend Angle – Specifies the angle in degrees where blending occurs between the horizon line and sky. Values close to 0.0 produce a sharper horizon line, while larger values produce a softer horizon line.
Horiz. Surface Illum. – Specifies the intensity (in lx) of the illumination on horizontal surfaces coming from the sky.
Illumination Mask – Specifies which objects to be affected by the V-Ray Sun light.
LPE Tag – Allows you to specify a string tag that can be used in a Light Path Expression to isolate the contribution from this light. See the Advanced Light Path Expressions page for more information.
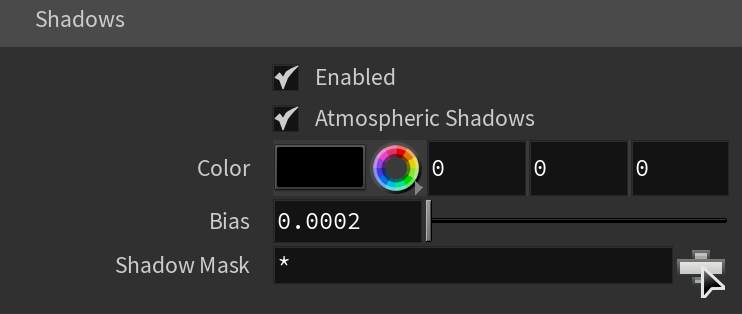
Shadows
Enabled – When enabled (the default), the light casts shadows. Disable this option to turn off shadows for the light.
Atmospheric Shadows – When enabled, the sun produces shadows from volumetric effects.
Color – Sets the color of the V-Ray Sun and Sky shadows.
Bias – Moves the shadow toward or away from the shadow-casting object (or objects). Higher values move the shadow toward the object(s) while lower values move it away. If this value is too extreme, shadows can "leak" through places they shouldn't or "detach" from an object. Other effects from extreme values include moire patterns, out-of-place dark areas on surfaces, and shadows not appearing at all in the rendering. For more information, see the Shadow Bias example below.
Shadow Mask – Specifies objects that cast shadows when light is directed at them.
Cloud
Enable Clouds – Enables the cloud system.
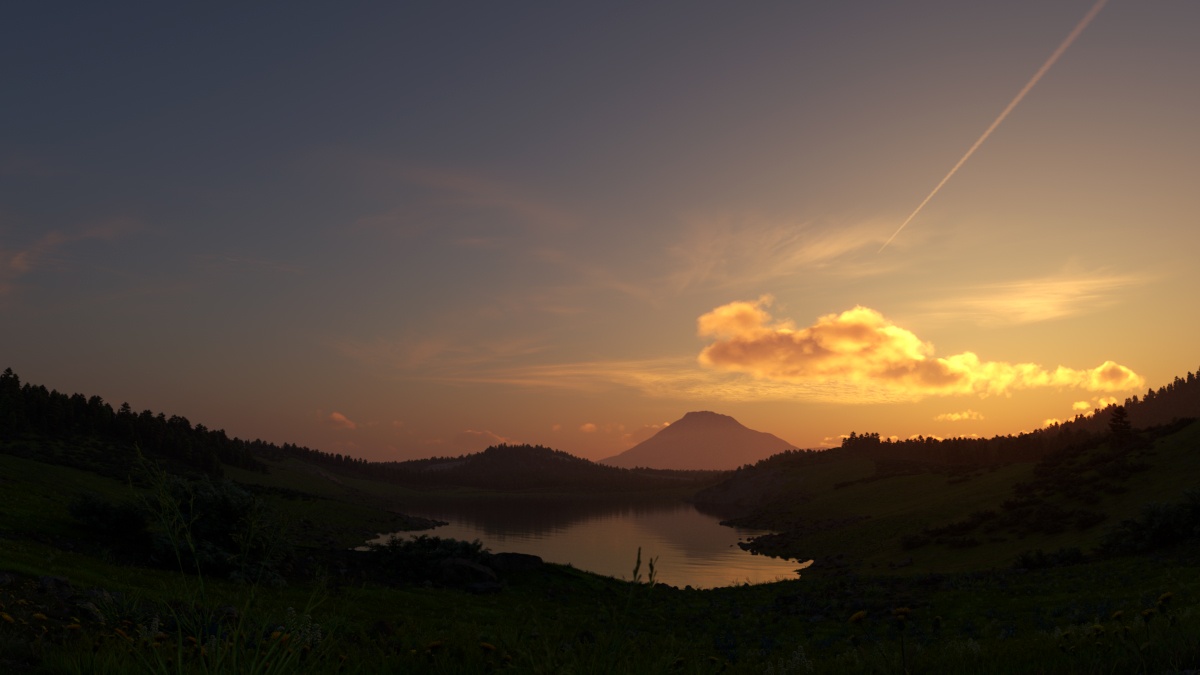
Enable Contrails – Enable simulation of plane contrails in the sky.

Enable Ground Shadows – When disabled, the entire scene is covered by a single shadow or fully illuminated depending on whether the sun is blocked by a cloud at the current camera position. This is useful for smaller scenes and speeds up the rendering process. When enabled, V-Ray calculates the shadows precisely at every point of the scene. This provides a lot more definition to the shadows but may slow down the rendering process. It is helpful in larger scenes where the effect of the clouds is more visible. For more information, see the Ground Shadows example below.
Density – Controls the density of the cumulus and stratus types of clouds. A value of 1 fills up the sky with clouds. For more information, see the Density example below.
Multiplier – A multiplier to the Density parameter. The larger the value, the darker the sky becomes at the horizon. Setting a value of 0 results in no clouds, regardless of the Density value.
Variety – Controls the variety of the cumulus and stratus types of clouds. For more information, see the Variety example below.
Seed – Generates a random value, based on the given number, to change the pattern of the clouds and the Contrails.
Cirrus – The maximum value of 1 fills the sky with cirrus clouds. Decreasing the value, lowers the presence of such clouds. When set to 0, the cirrus clouds are completely gone. For more information, see the Cirrus example below.
Longitude Offset – Moves the cloud system along the longitude. For more information, see the Longitude and Latitude Offset example below.
Latitude Offset – Moves the cloud system along the latitude. For more information, see the Longitude and Latitude Offset example below.
Height – Specifies the cloud position in height. For more information, see the Height example below.
Thickness – Lower values make the cumulus and stratus types of clouds thin and sheer/lucent, while higher values make them full and heavy. For more information, see the Thickness example below.
Longitude Phase – Controls the phase by longitude and it can be used to fine-tweak the cumulus and stratus clouds appearance. The appearance of the clouds loops at 0, 100, 200, etc. This parameter can be animated to resemble natural clouds appearance.
Latitude Phase – Controls the phase by latitude and it can be fine-tweak the cumulus and stratus clouds appearance. The appearance of the clouds loops at 0, 100, 200, etc. This parameter can be animated to resemble natural clouds appearance.

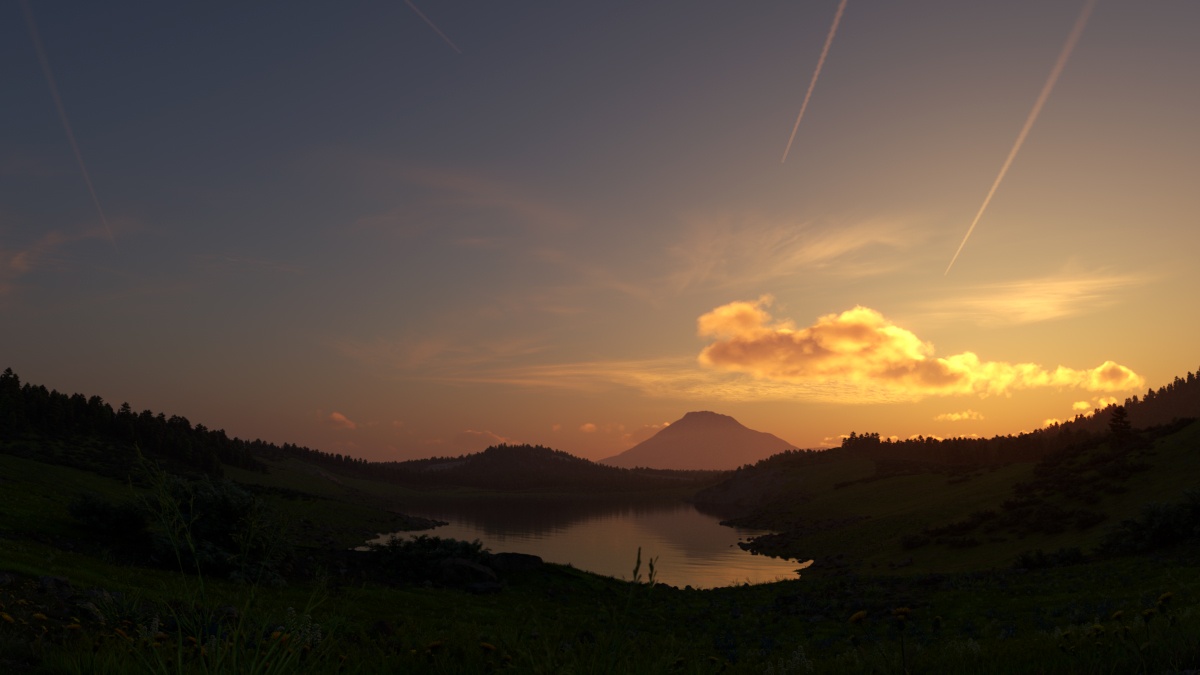
Number of Contrails – Determines the number of contrails generated. See the Number of Contrails example below for more information.
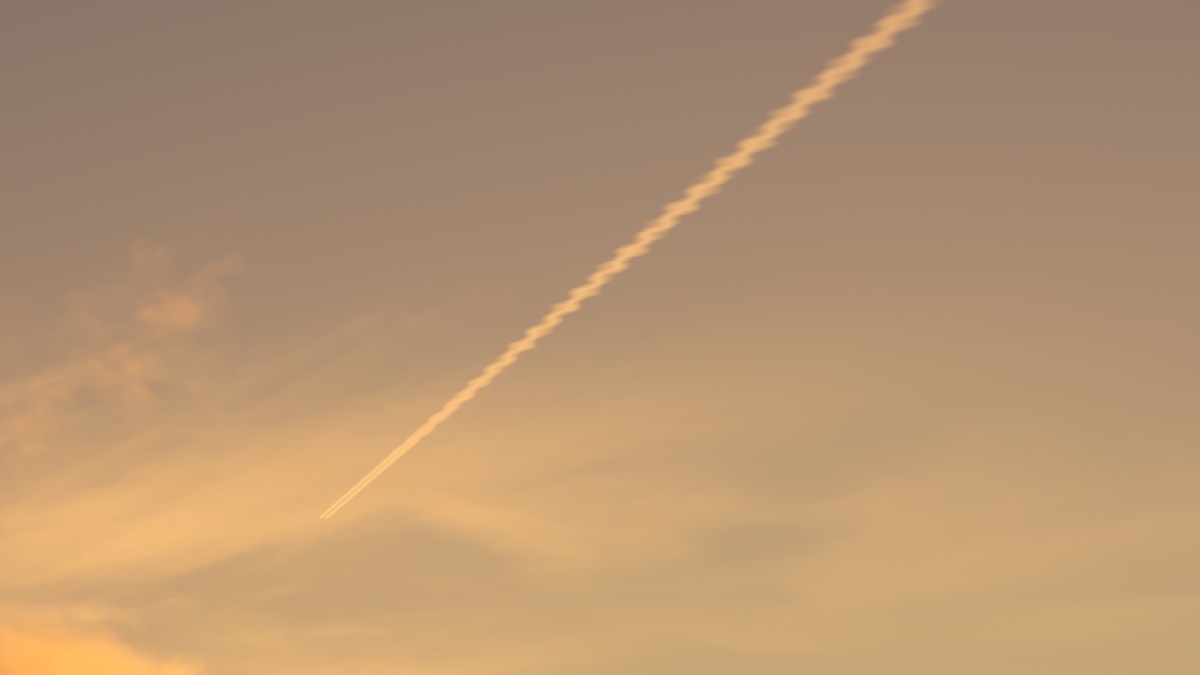
Strength – Determines the opacity of the contrails. Lower values create less opaque trails, which look older. See the Contrails Strength example below for more information.
Distortion – Determines the amount of distortion in the contrails. See the Contrails Distortion example below for more details.
Offset Long. – Offsets the contrails by a given value, according to the X axis. See the Contrails Offset example below for more information.
Offset Lat. – Offsets the contrails by a given value, according to the Y axis. See the Contrails Offset example below for more information.
Time – Determines how far the contrails progress along the sky. See the Contrails time animation below for more details.

Textures
Shadow Color – Sets the color of the V-Ray Sun and Sky shadows.

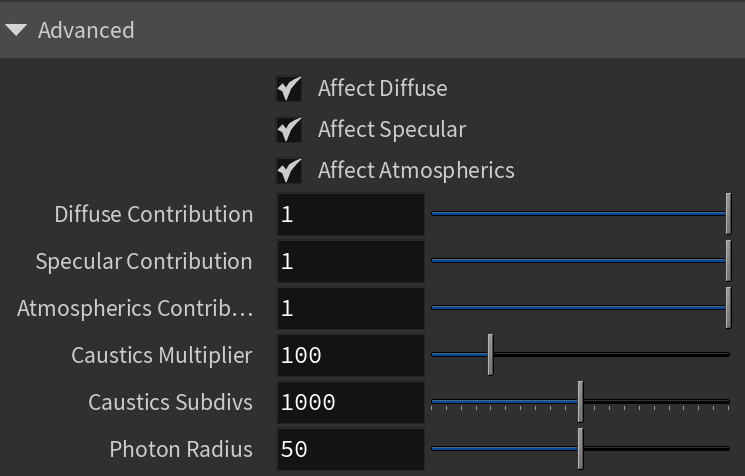
Advanced
Affect Diffuse – Determines whether the light affects the diffuse properties of the materials.
Affect Specular – Determines whether the light affects the specular of the materials. This means glossy reflections.
Affect Atmospherics – Determines whether the light influences the atmospheric effects in the scene.
Diffuse Contribution – When Affect Diffuse is enabled, specifies a multiplier for the effect of the light on the diffuse component.
Specular Contribution – When Affect Specular is enabled, specifies a multiplier for the effect of the light on the specular component.
Atmospheric Contribution – When Affect Atmospherics is enabled, this value determines the amount of involvement.
Caustics Multiplier – Specifies a multiplier for the generated caustics by the selected object. Note that this multiplier is cumulative - it does not override the multiplier in the Caustics Tab of the V-Ray Render Settings.
Caustics Subdivs – Used by V-Ray when calculating Caustics. Lower values mean more noisy results, but render faster. Higher values produce smoother results but take more time.
Photon Radius – Determines the radius of the area in which photons are shot. This area is represented by the cylinder around the Sun's ray vector. This parameter has effect when photons are used in the GI solutions or caustics.
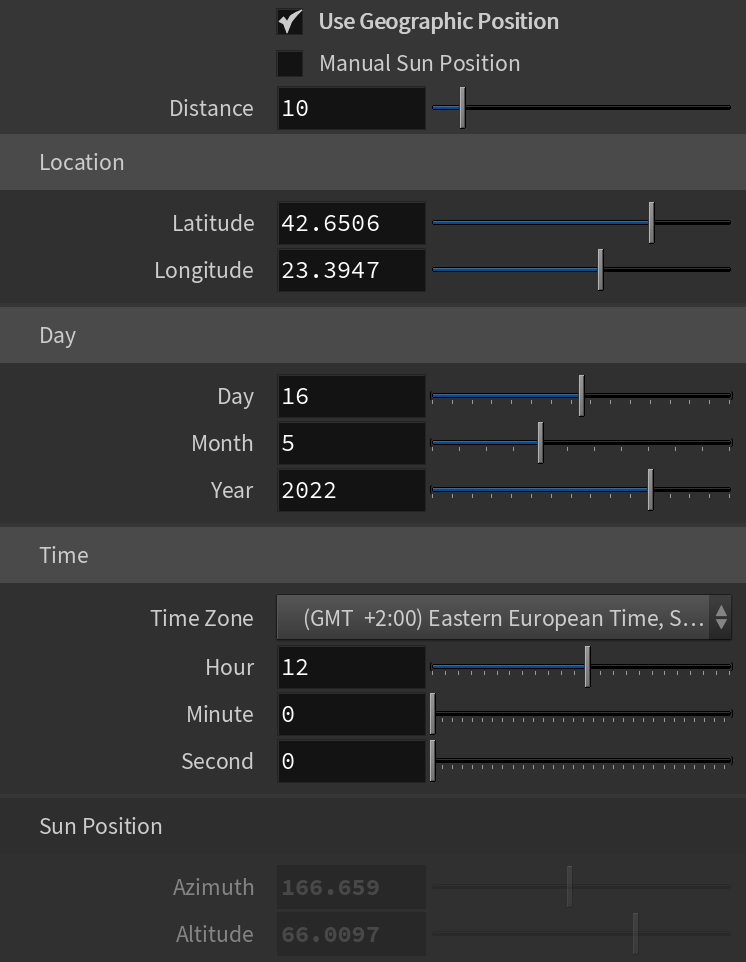
Geographic Position Tab
Use Geographic Position – When enabled, uses the location, day, and time specified below to calculate the Sun's transformations in the scene. When Manual Sun Position is also enabled, uses just the Azimuth and Altitude to calculate the Sun's transformations.
Manual Sun Position – When enabled, the Sun Position can be manually changed without setting a geographic location.
Distance – The preview distance between the origin and the sun. It has no effect on the final rendering.
Location
Latitude – Specifies the latitude in degrees, i.e. north or south of the Equator. Takes values from -90 degrees to 90 degrees.
Longitude – Specifies the longitude in degrees, i.e. east or west of the prime meridian. Takes values from -180 degrees to 180 degrees.
Day
Day – Specifies the day of the year.
Month – Specifies the month of the year.
Year – Specifies the year.
Time
Time Zone – Specifies a time zone.
Hour – Specifies the hour.
Minute – Specifies the minute.
Second – Specifies the seconds.
Sun Position
Azimuth – Controls the custom sun azimuth angle (horizontal rotation) when Manual Sun Position is enabled.
Altitude – Controls the custom sun altitude angle (vertical rotation) when Manual Sun Position is enabled.
Examples
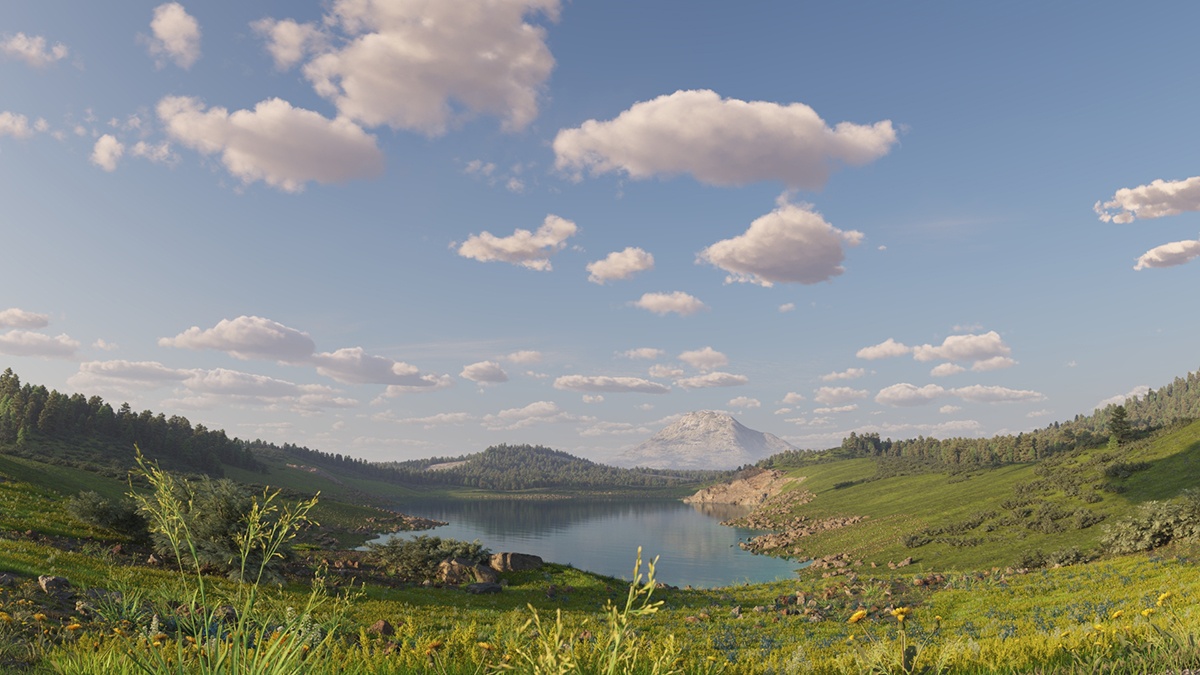
Example: Turbidity
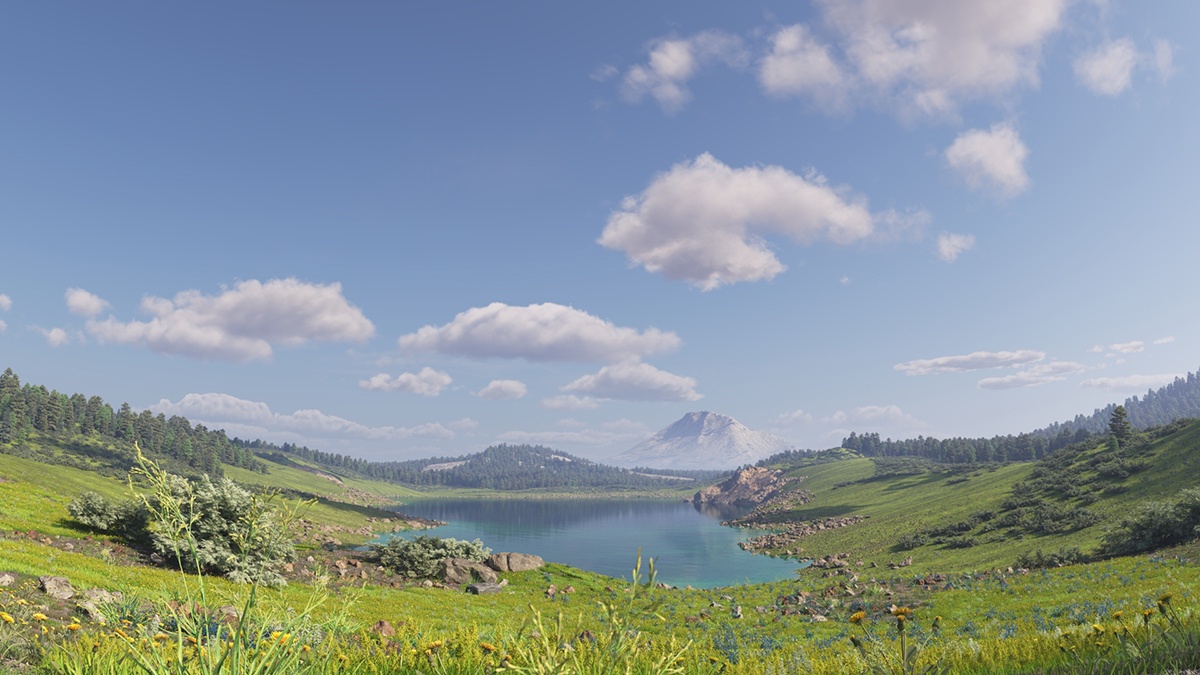
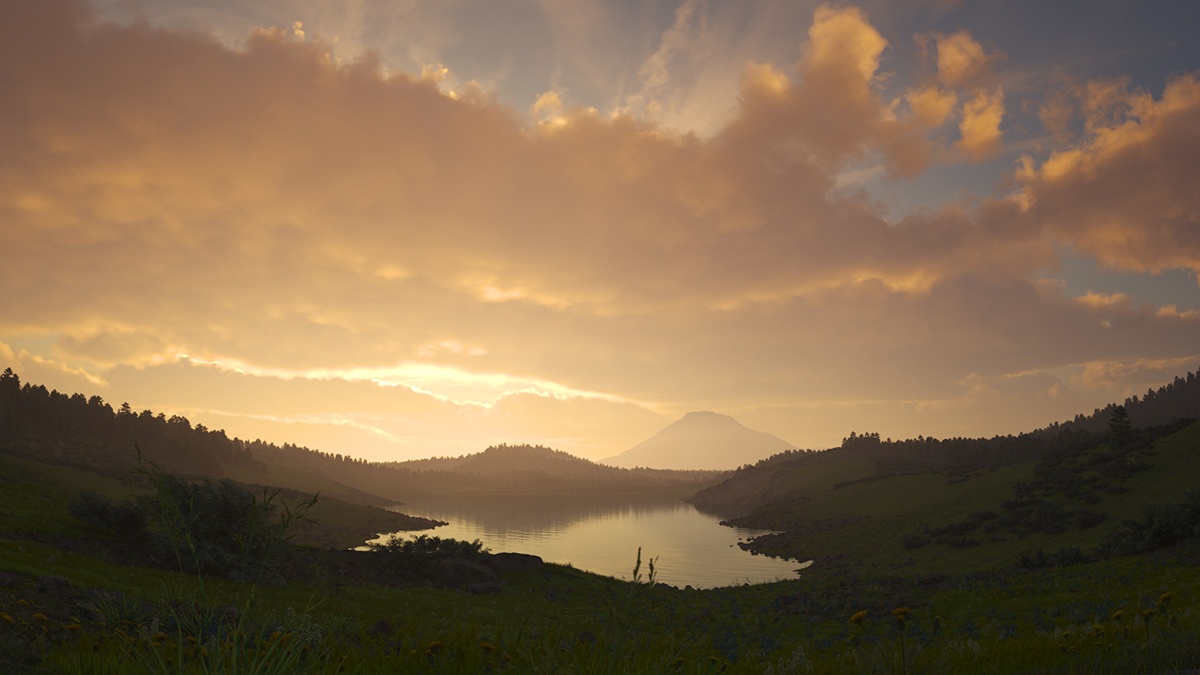
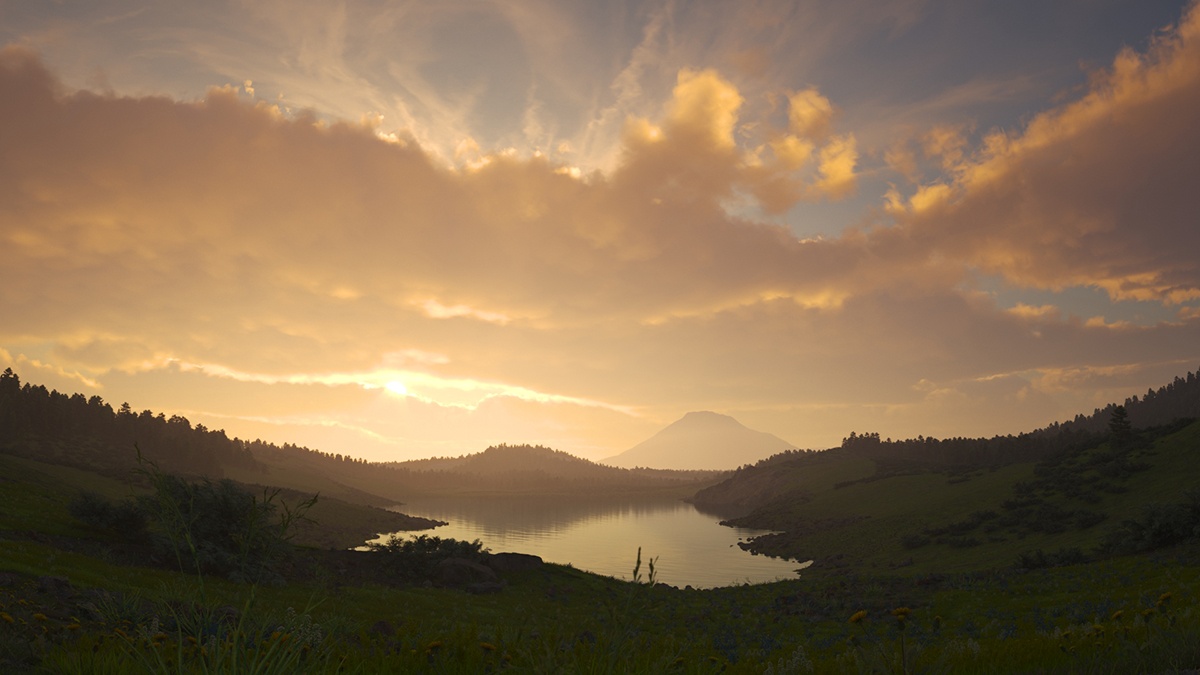
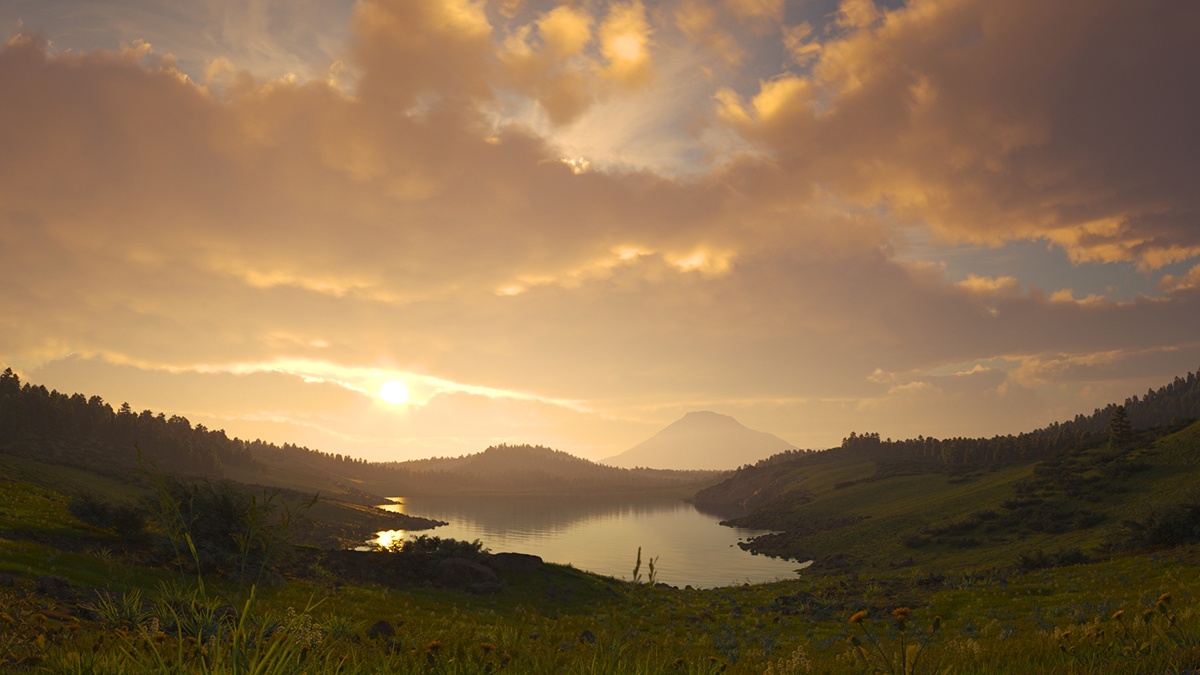
Turbidity creates the look of the light from the Sun having to travel through particles in the atmosphere, like smog (when the value is increased). This example shows how the Turbidity attribute is effected by the height of the V-Ray Sun in our scene. The common settings are Intensity multiplier: 1, Size multiplier: 3, while the height and Turbidity are adjusted.
Sun height at 45°, Turbidity: 2
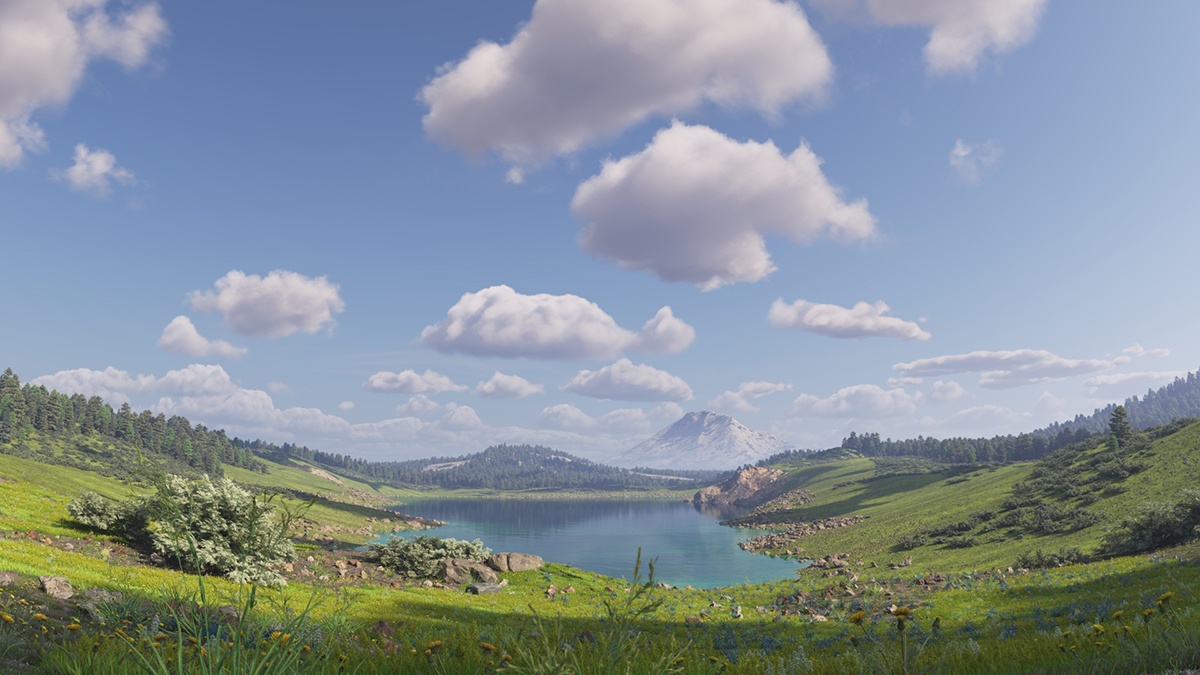
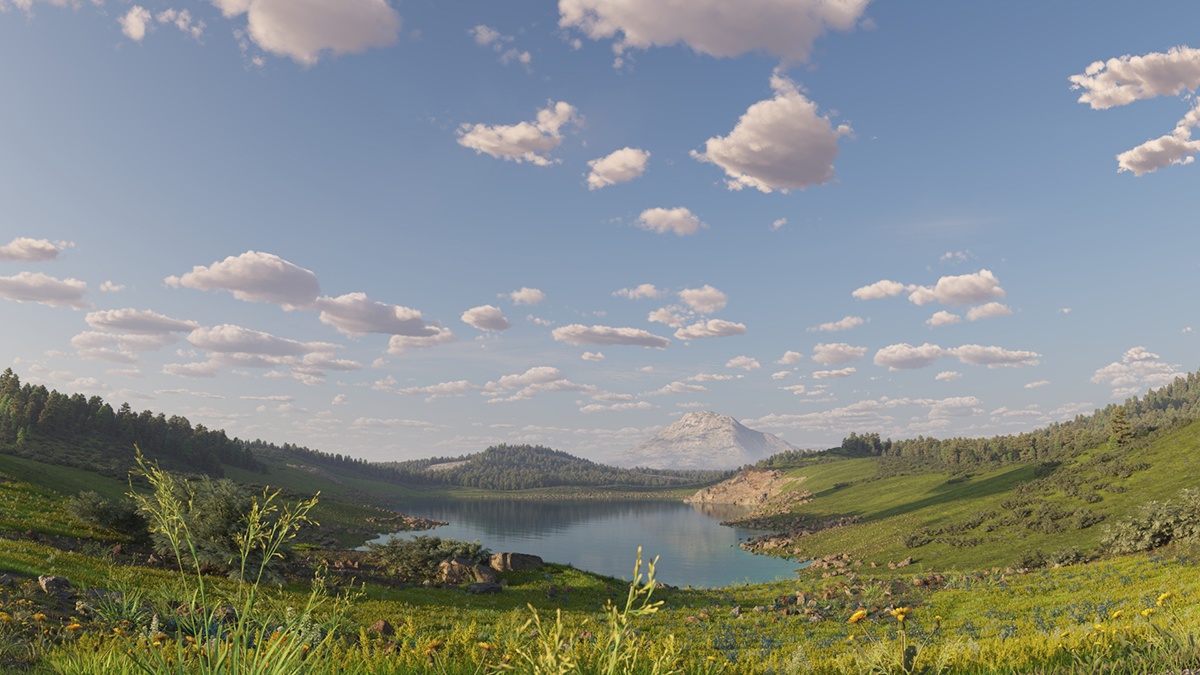
Sun height at 45°, Turbidity: 5

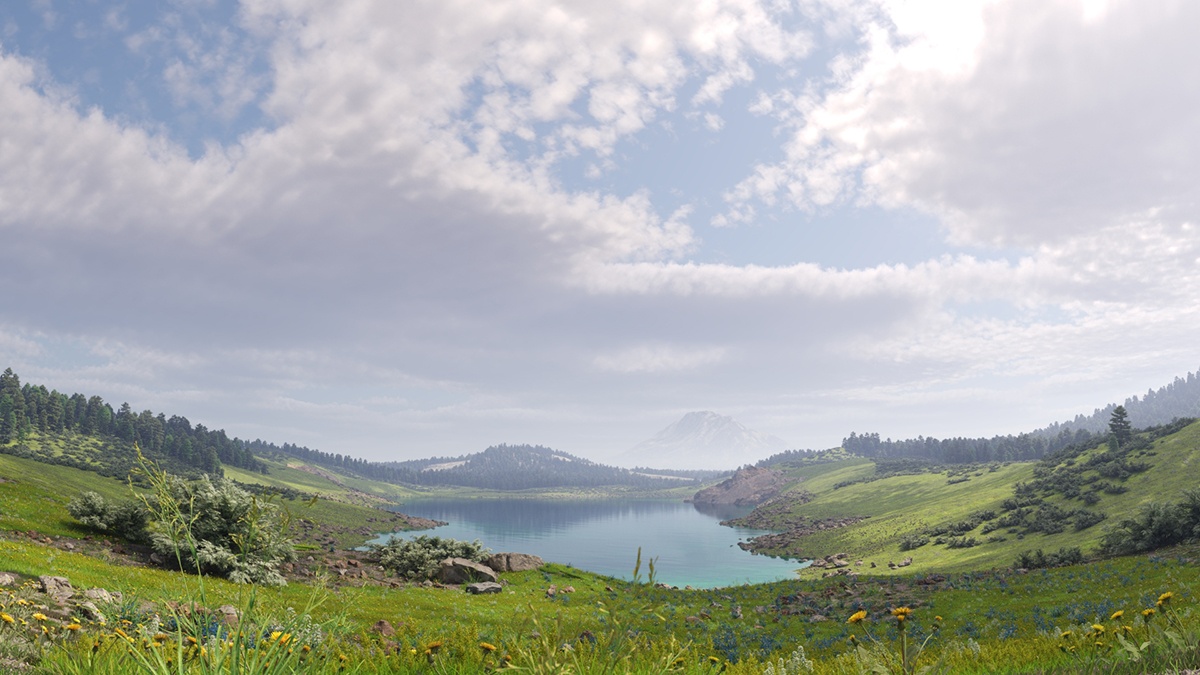
Sun height at 45°, Turbidity: 10
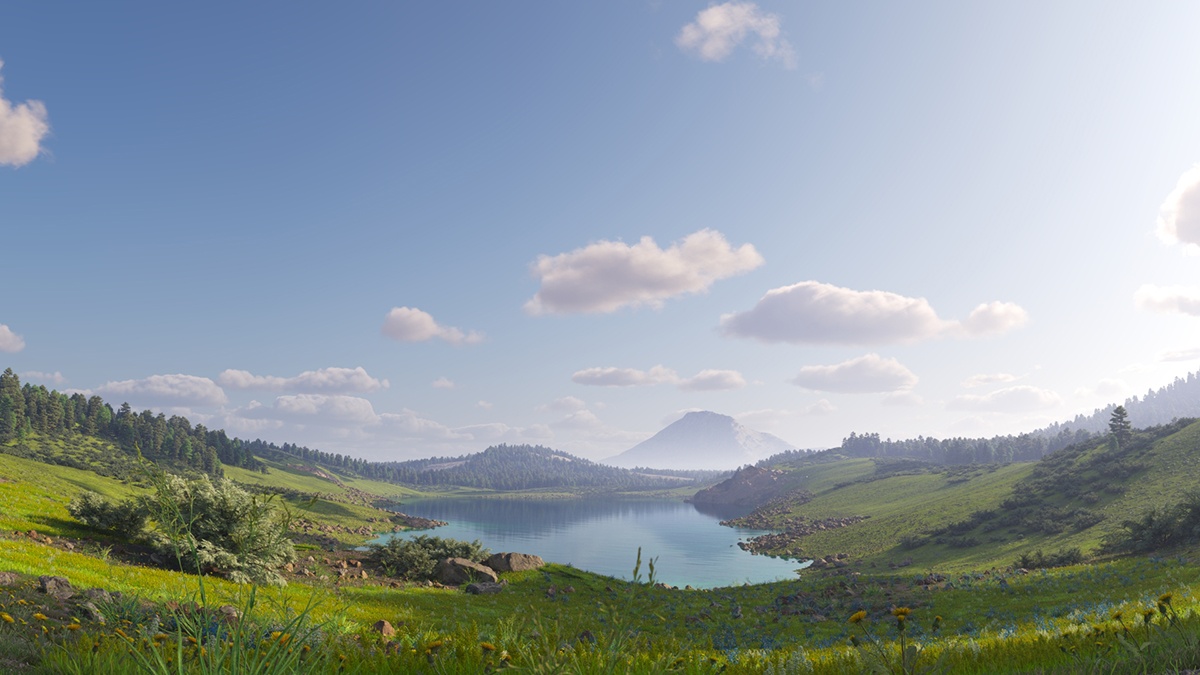
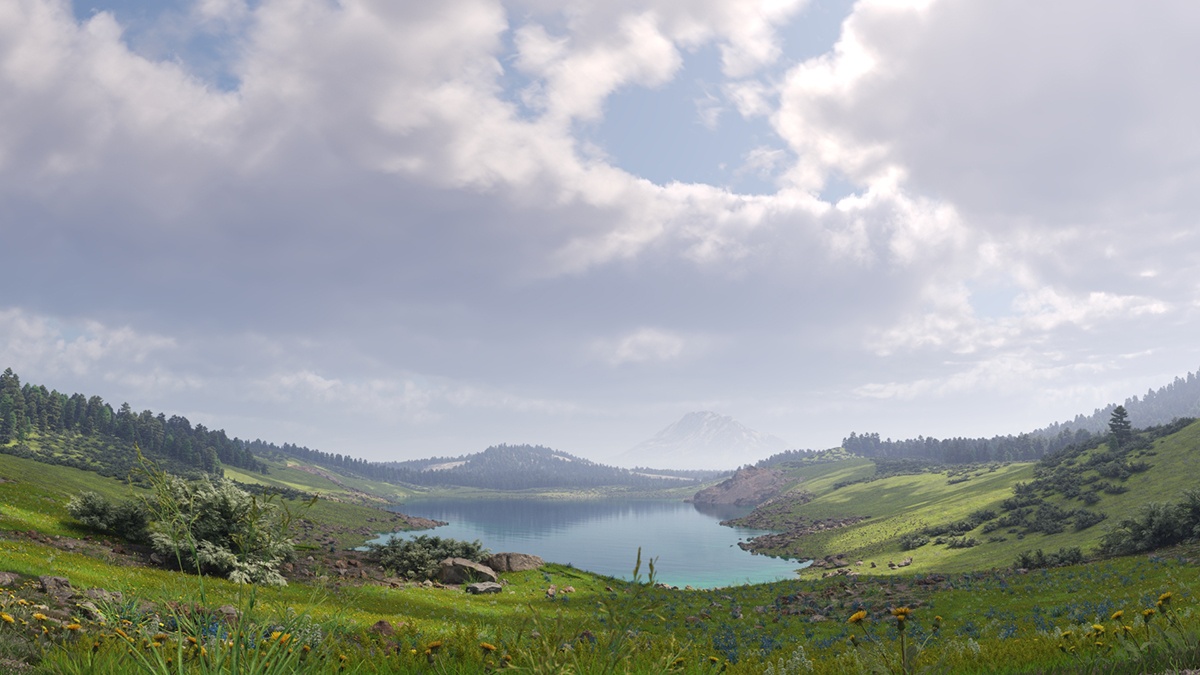
Sun height at 10°, Turbidity: 2
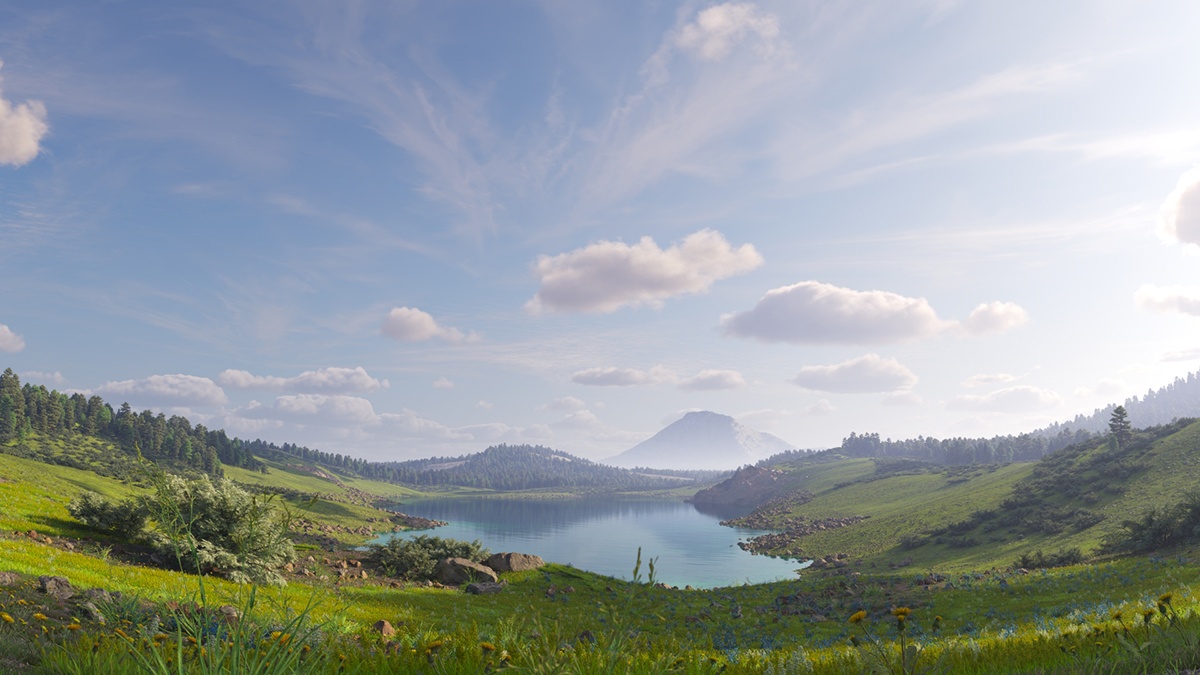
Sun height at 10°, Turbidity: 5
Sun height at 10°, Turbidity: 10
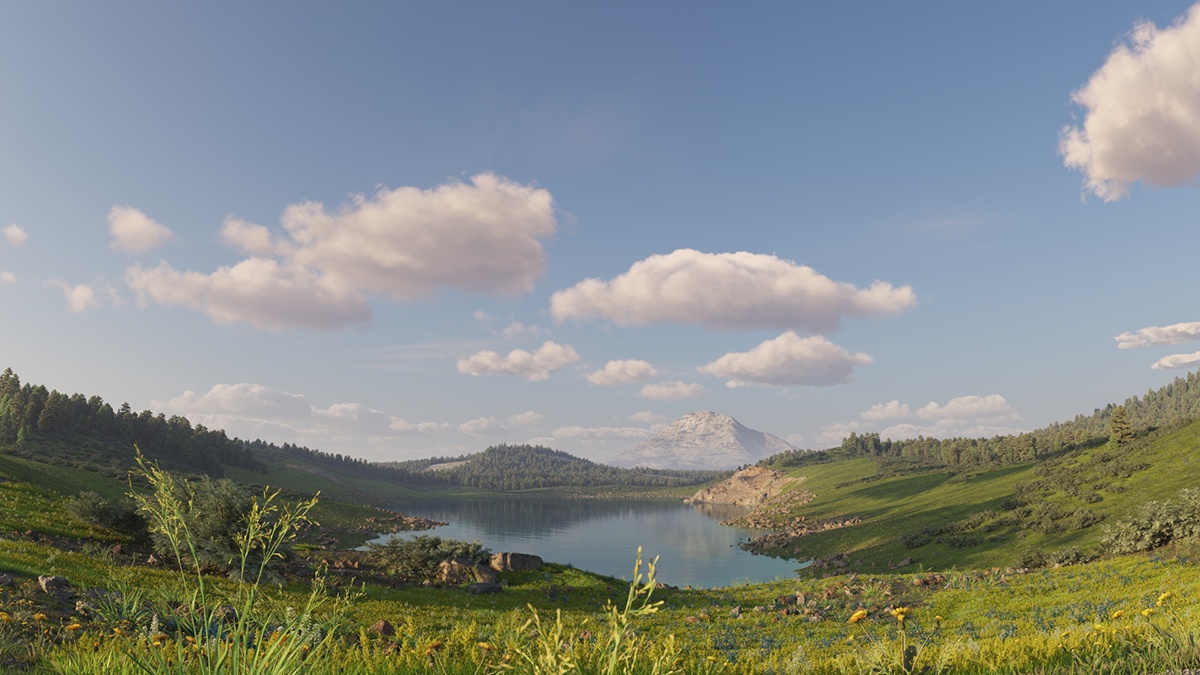
Example: Ozone value
The Ozone attribute does not change the color of the sky, but the color of the light that hits the objects in the scene. It is a subtle effect but can help boost the photo-realism of your renders. In this example, the only thing that is adjusted is the Ozone value, while the height of the sun remains the same and the following attributes are constant; Turbidity: 2.0, Intensity multiplier: 1.0, Size multiplier: 3.0.

Example: Intensity Multiplier
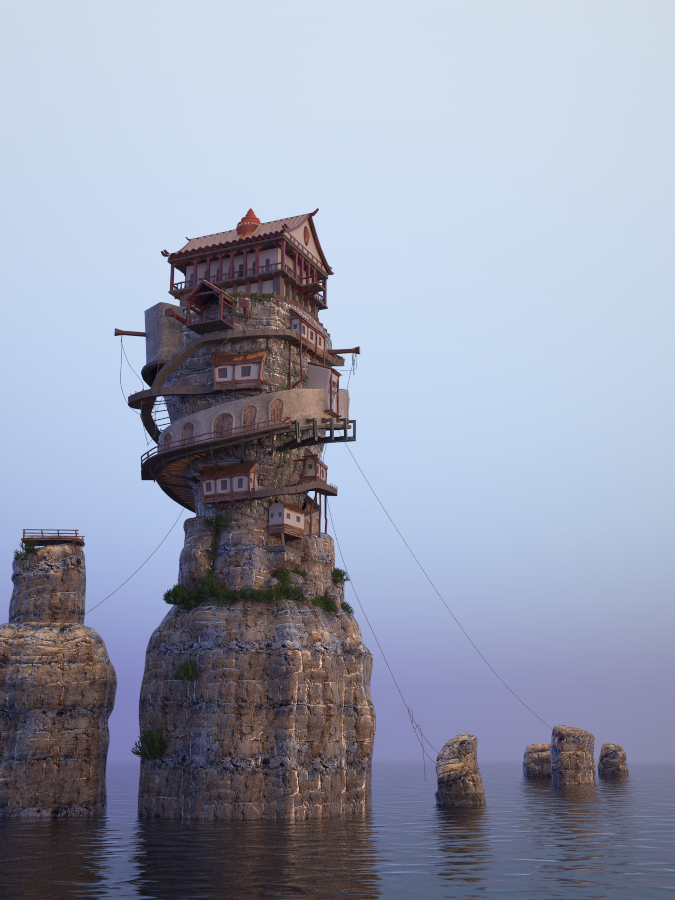
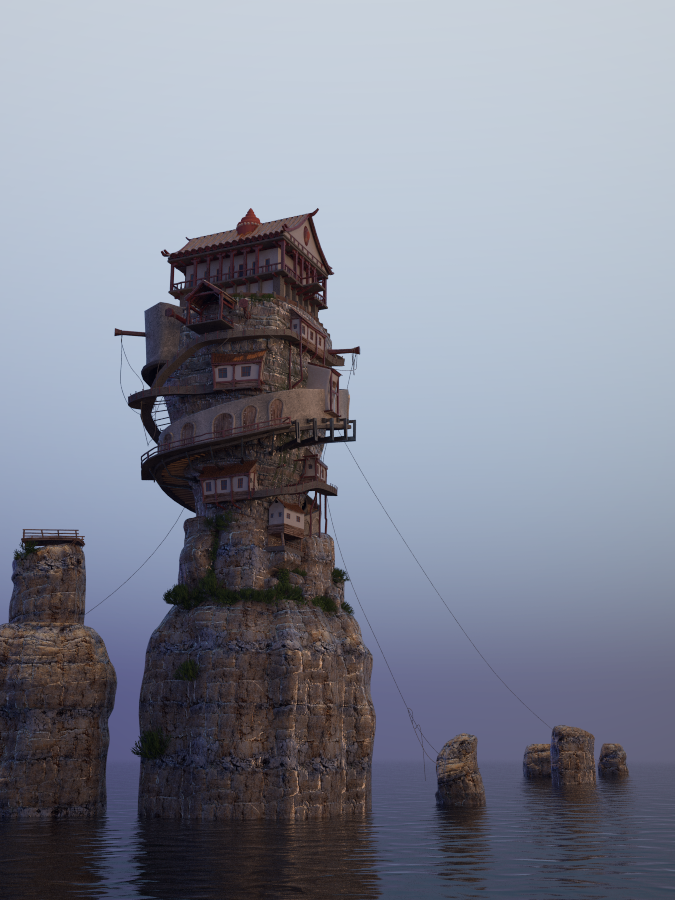
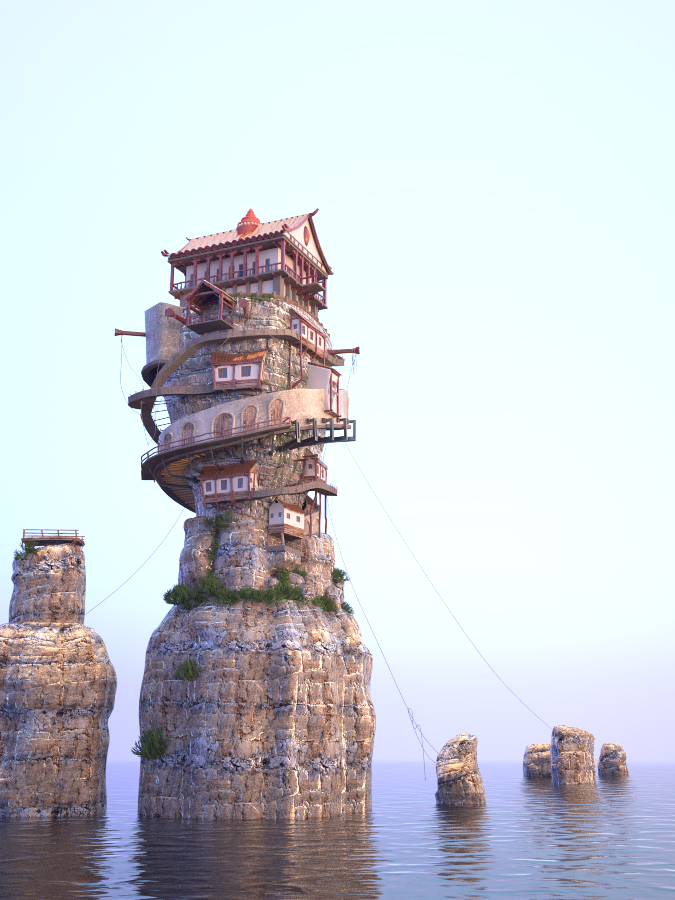
The Intensity multiplier of the V-Ray Sun adjusts the brightness of it in the scene. This is also effected by the height of the Sun in the scene. To simulate the way the sun actually works, the closer the V-Ray Sun is to the horizon, the warmer the color and the less bright it will appear in the render. As you raise it up, the color will be cooler (or more blue) and the brighter it will be, like mid-day light. In the example renders below, the common settings are Turbidity: 5.0 and Size multiplier: 3.0 (which does not change the brightness), while the height (from the horizon) and Intensity multiplier are adjusted.
Sun Height at 45°, Intensity multiplier: 1

Sun Height at 45°, Intensity multiplier: 0.5
Sun Height at 45°, Intensity multiplier: 3
Sun Height at 90°, Intensity multiplier: 1
Sun Height at 90°, Intensity multiplier: 0.5
Sun Height at 90°, Intensity multiplier: 3
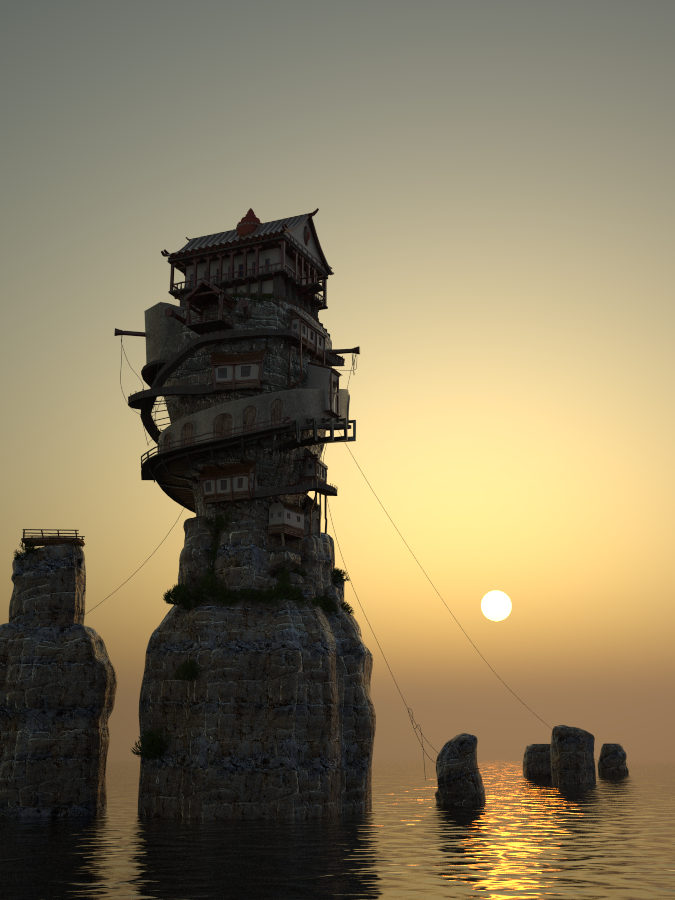
Sun Height at 10°, Intensity multiplier: 1
Sun Height at 10°, Intensity multiplier: 0.5
Sun Height at 10°, Intensity multiplier: 3
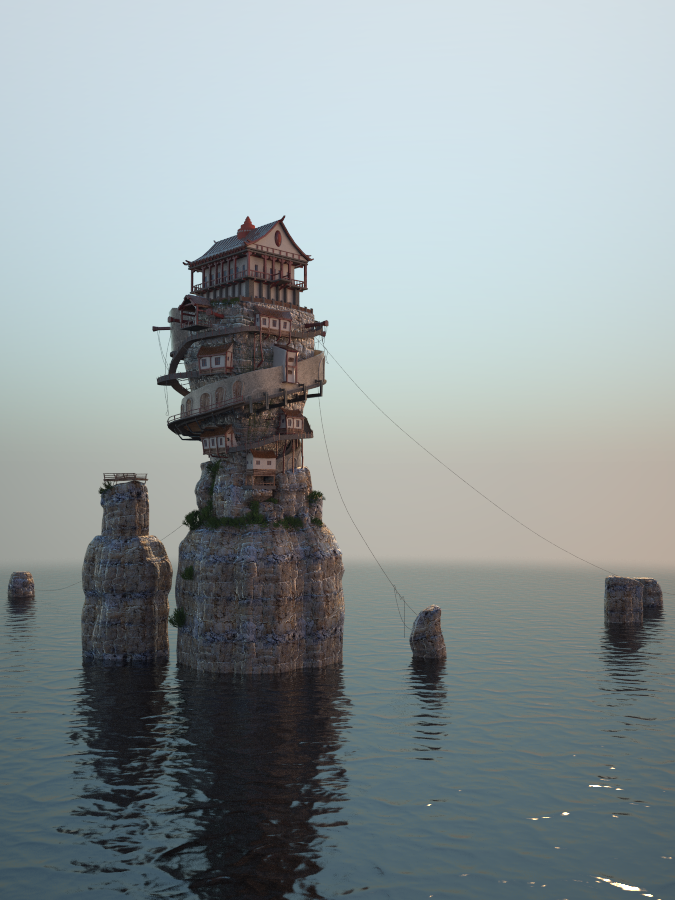
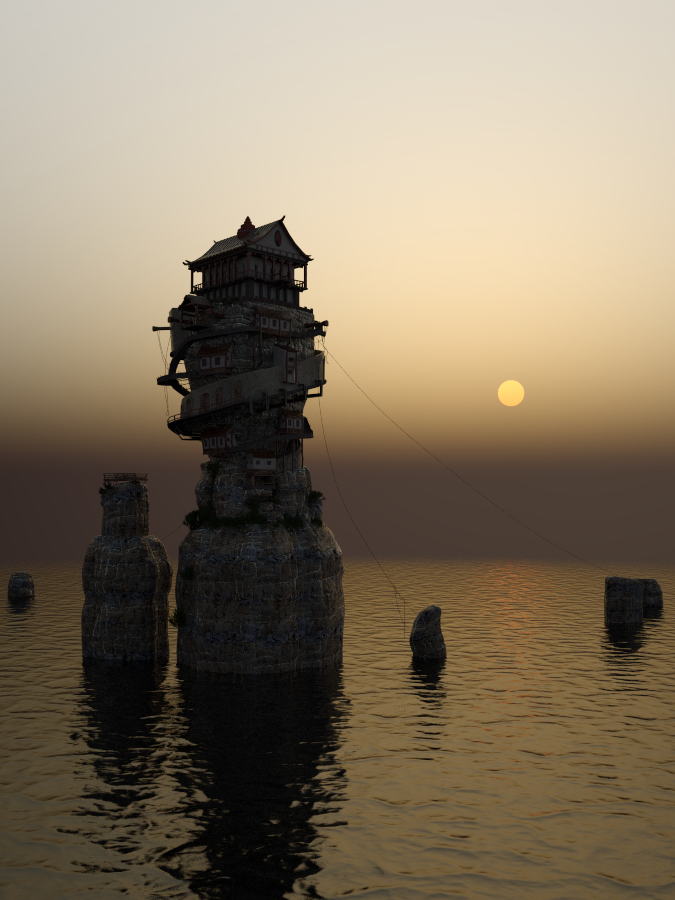
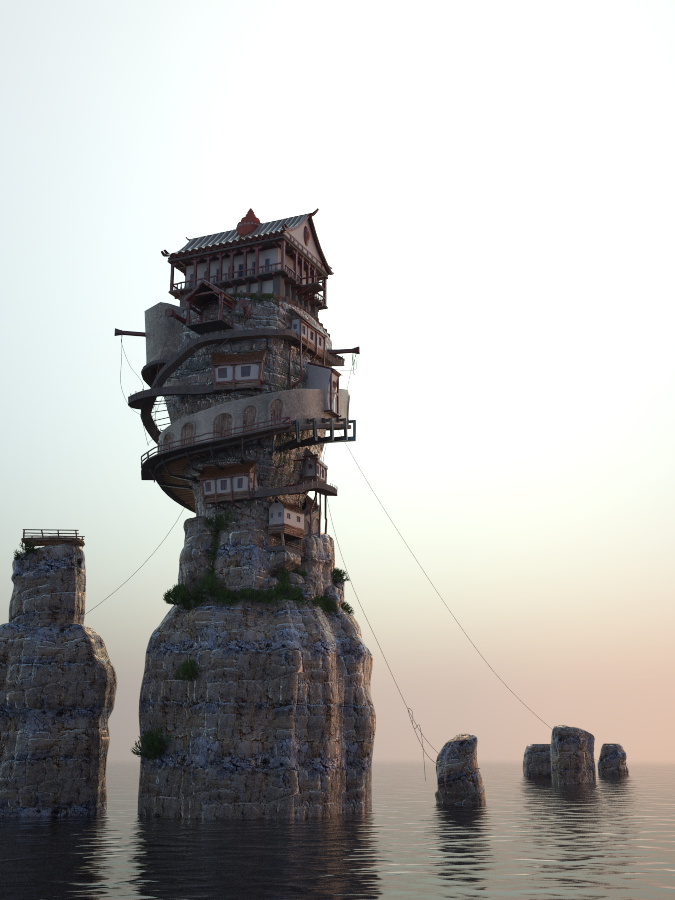
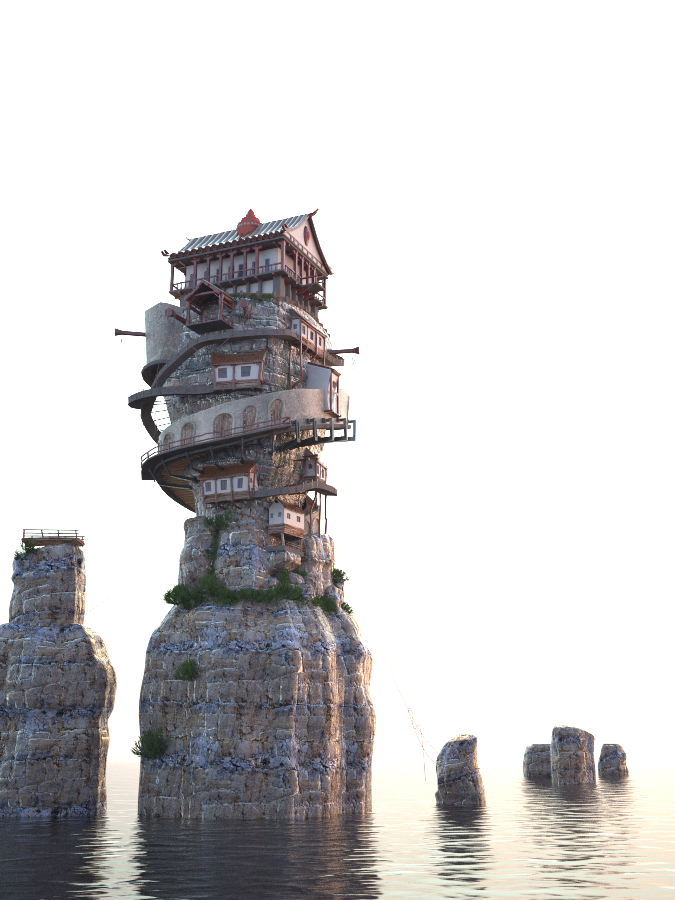
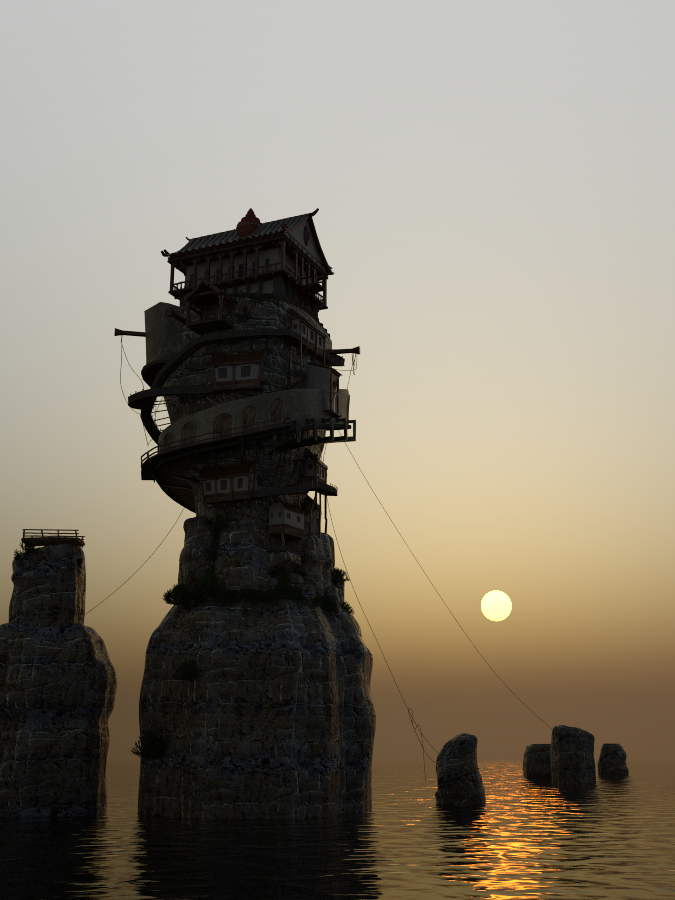
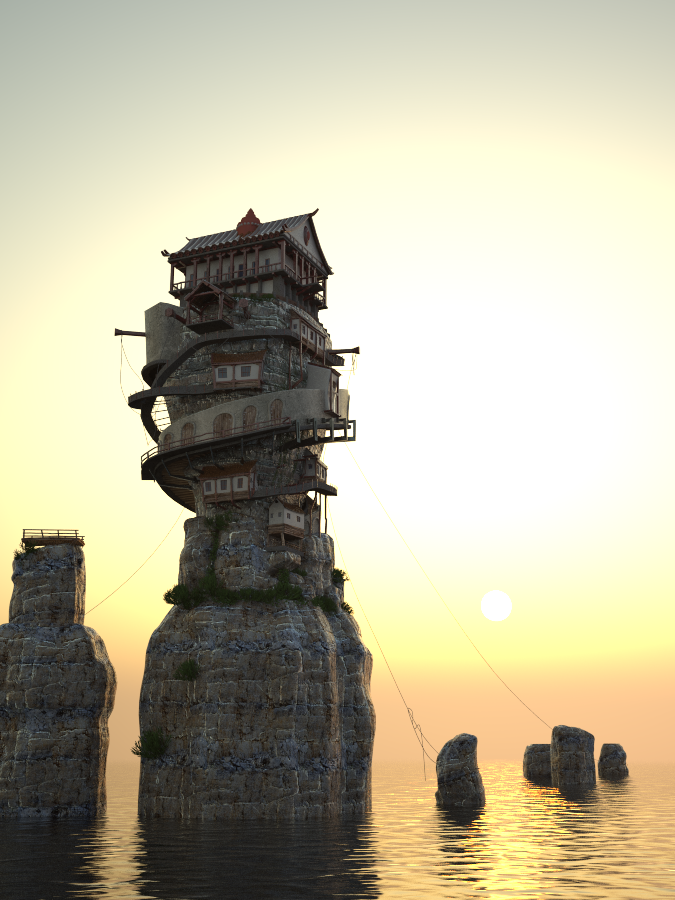
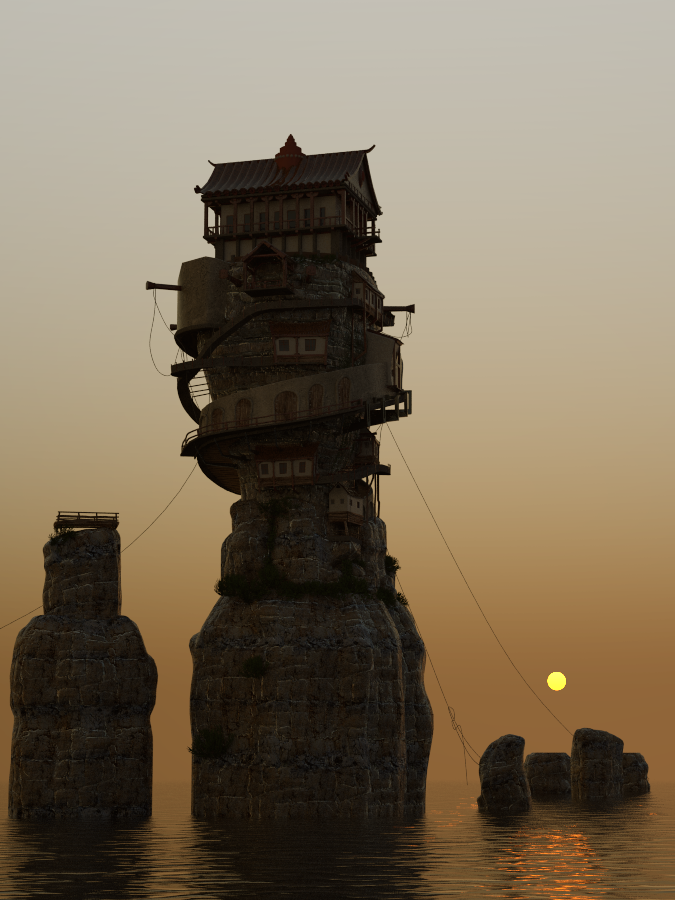
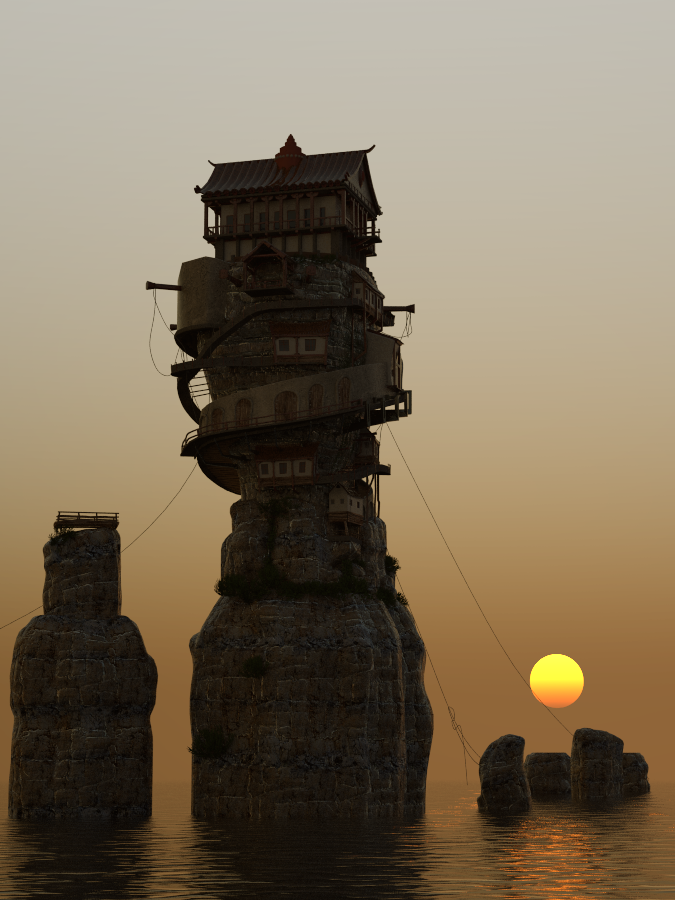
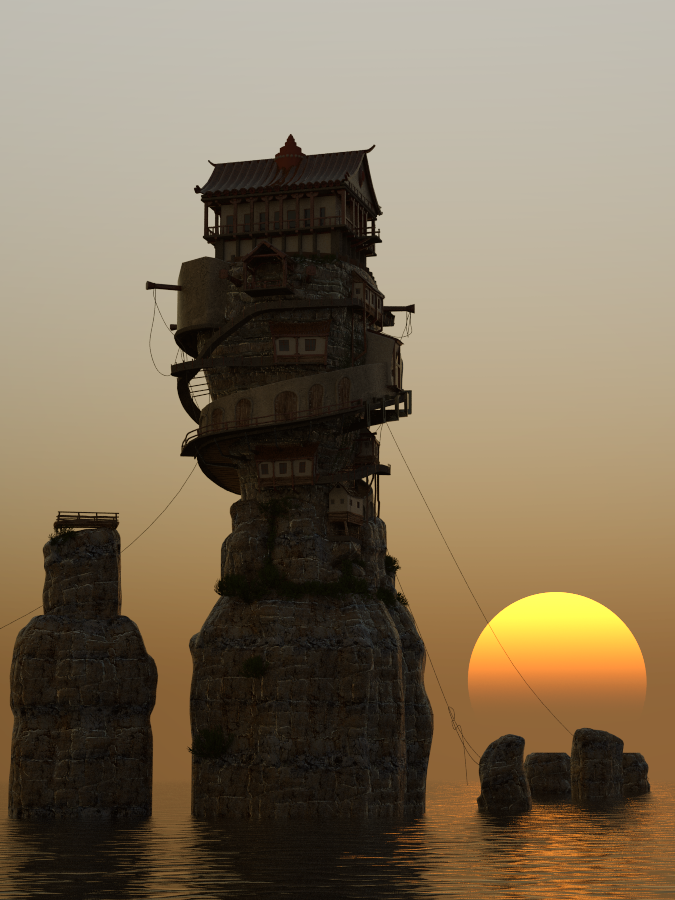
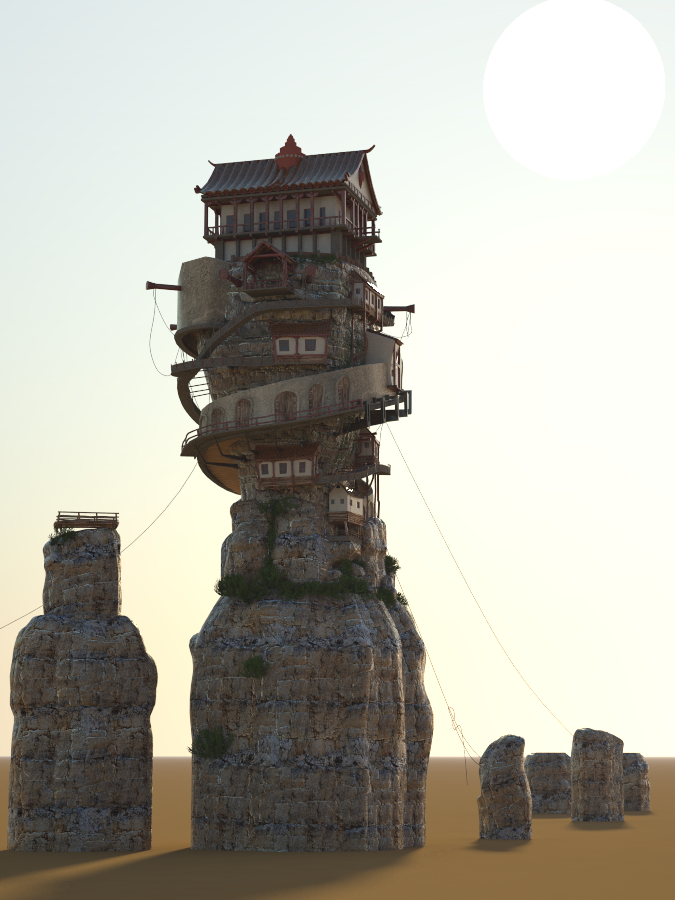
Example: Size multiplier (Size & Area shadows effect)
The Size multiplier has no effect on the brightness of the V-Ray Sun. As shown early, the Intensity multiplier is adjusted to change how bright the light is coming from the Sun. The Size multiplier does however change the visual representation of the Sun when it's scene in the render and just like with other (physically accurate) lights, the larger they are, the softer the shadows are that are cast from that light. Increasing this attribute as the height of the sun is lowered can also help in the realism of your renders. In the following example, the height of the Sun and the Size multiplier are adjusted, while values for attributes like Intensity multiplier (at 1.0) are constant. The first series of images show how the size of the sun is displayed in the reflection of the water. The second set shows the shadows being task on a ground plane.
Sun height at 5°, Size multiplier: 1.0
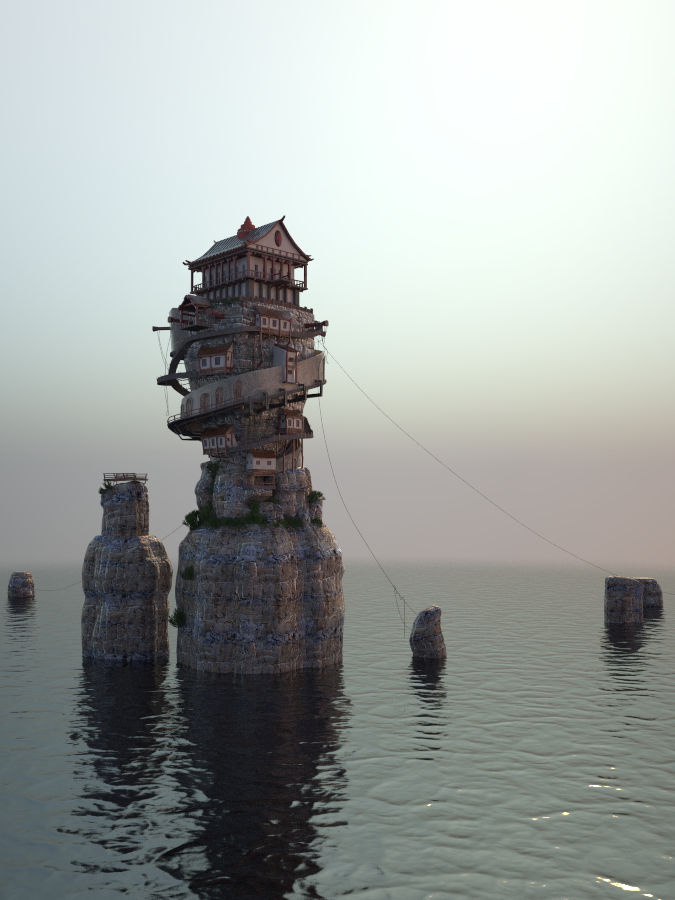
Sun height at 5°, Size multiplier: 3.0
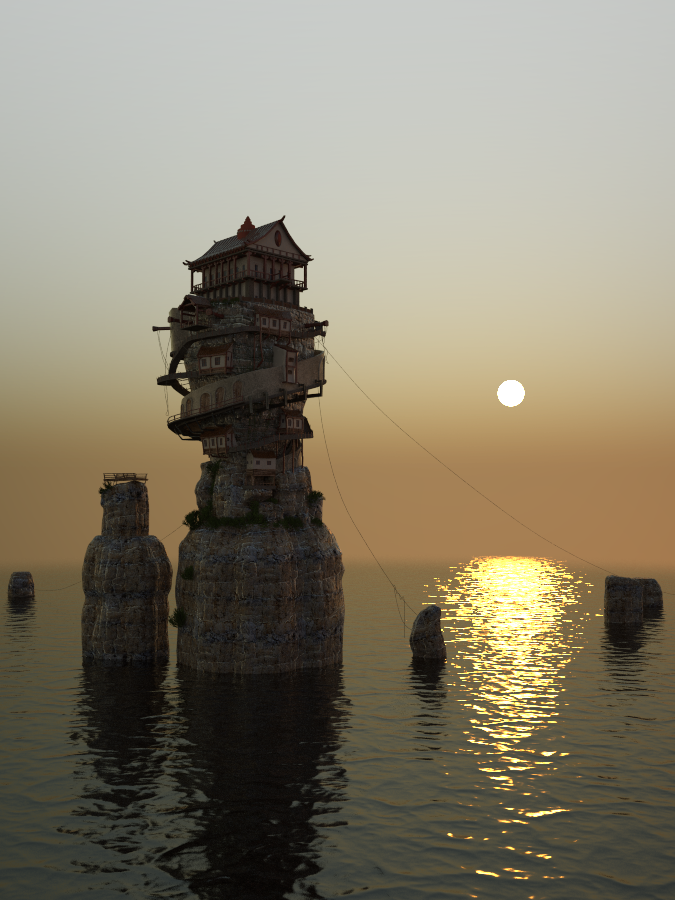
Sun height at 5°, Size multiplier: 10.0
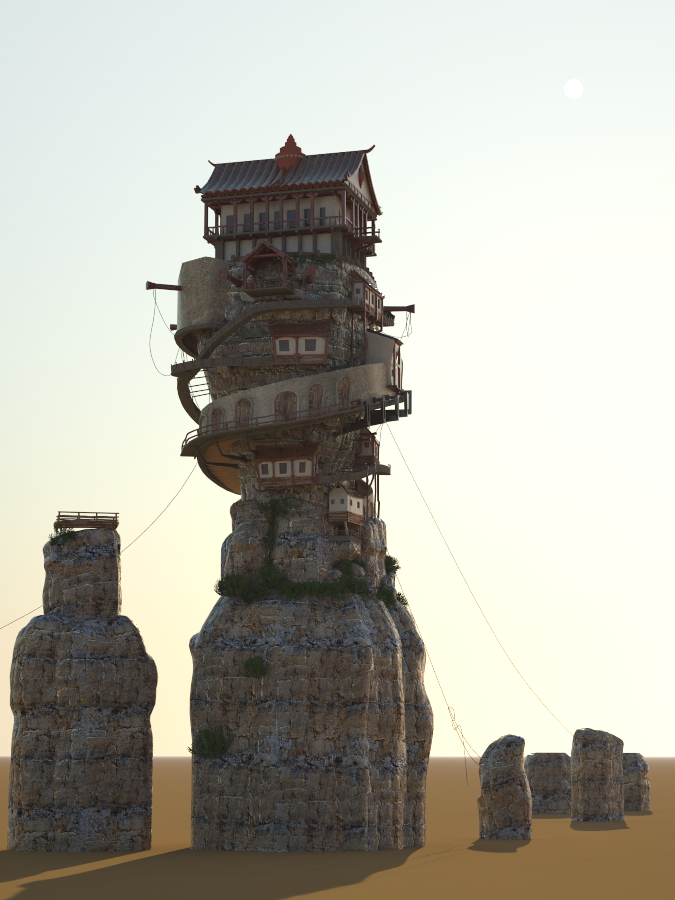
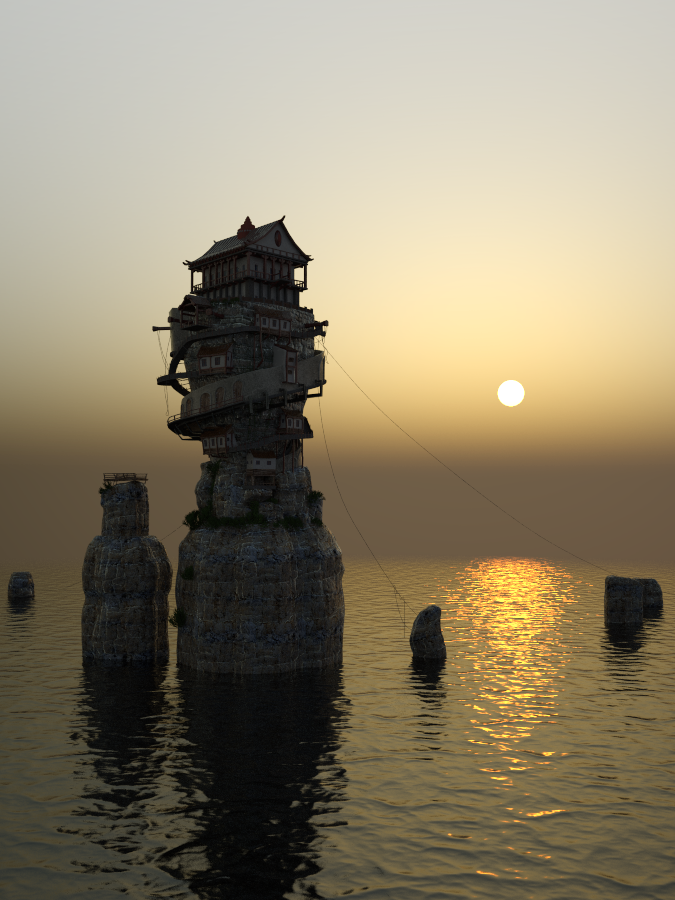
Sun height at 20°, Size multiplier: 1.0

Sun height at 20°, Size multiplier: 3.0
Sun height at 20°, Size multiplier: 10.0
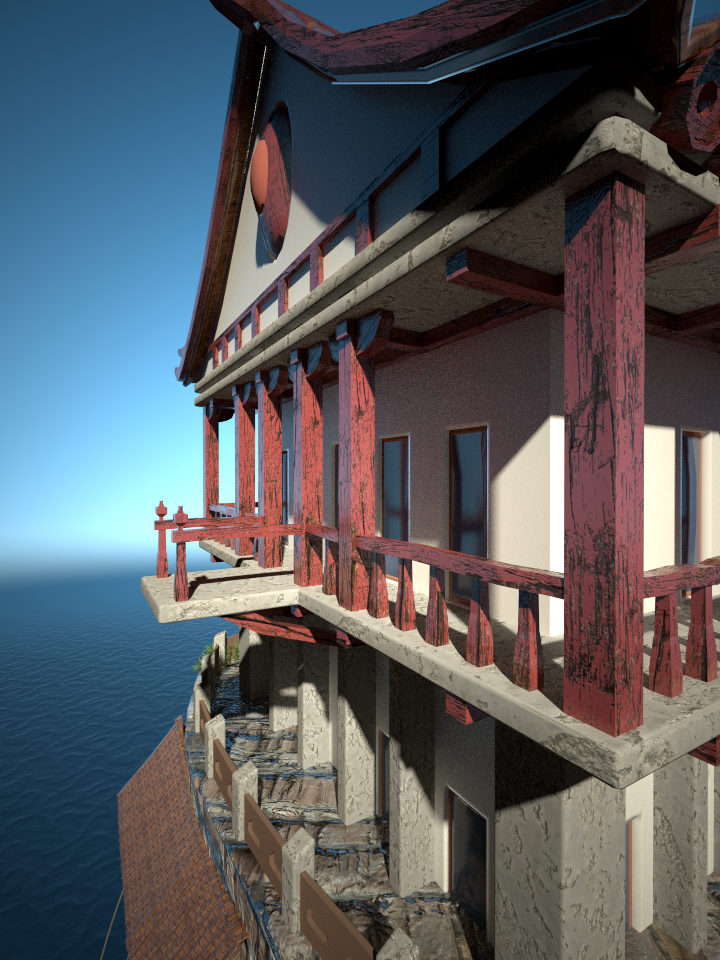
Example: Shadow Bias
In the example renders below, the common settings are Intensity multiplier: 1, Size multiplier: 3.0, while the Bias is the only attribute adjusted between renders. The values shown in the example are highly exaggerated to help show the effect the Bias has on the scene. The change in the shadow position is most noticeable on the front of the building below the roof line where the shadow cast by the roof recedes back toward the top left overhang of the roof as the Bias value increases.
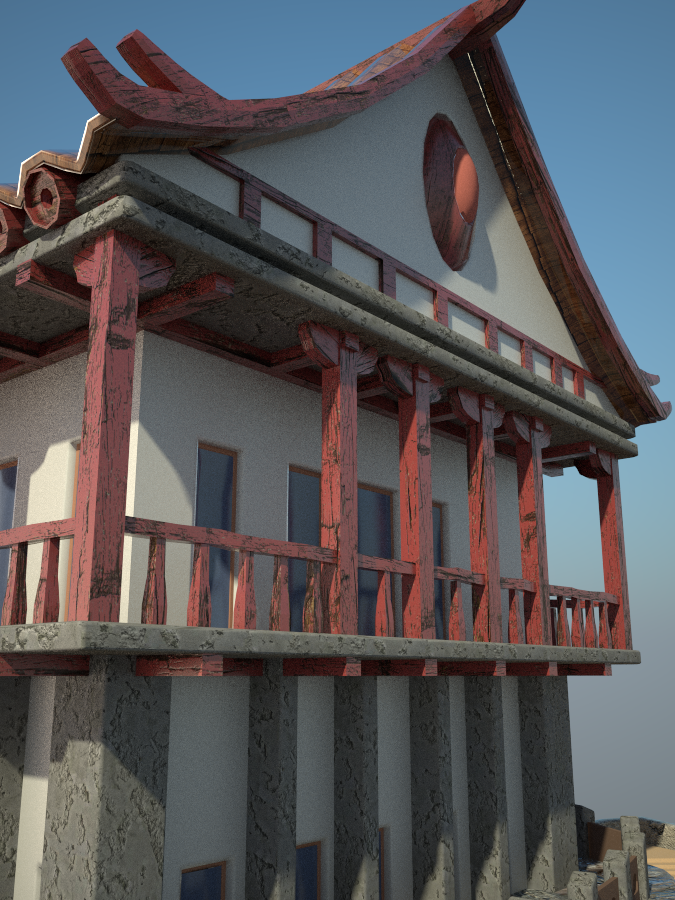
Bias: 0.02 (default)
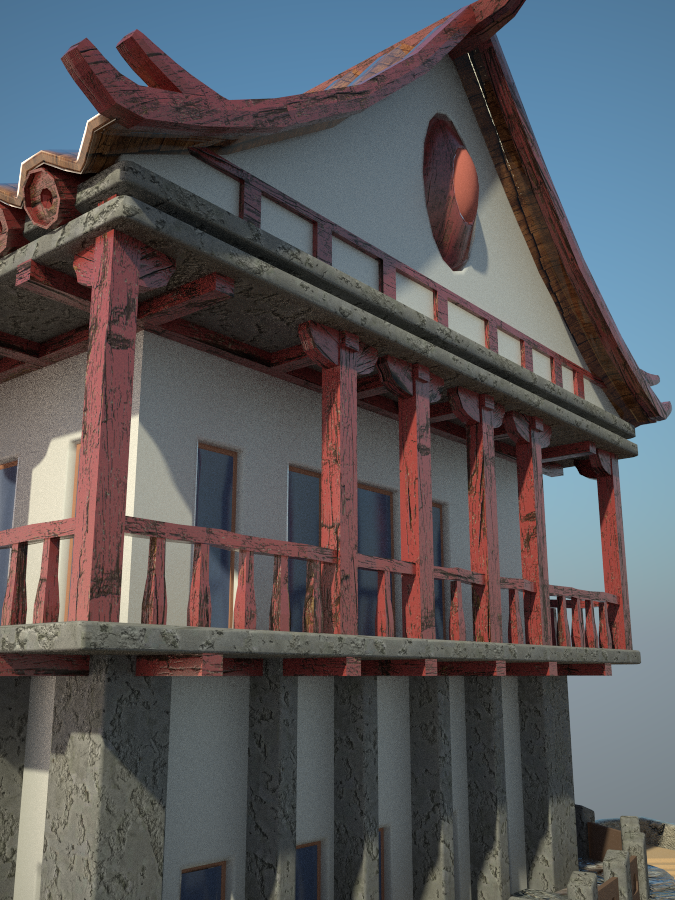
Bias: 12
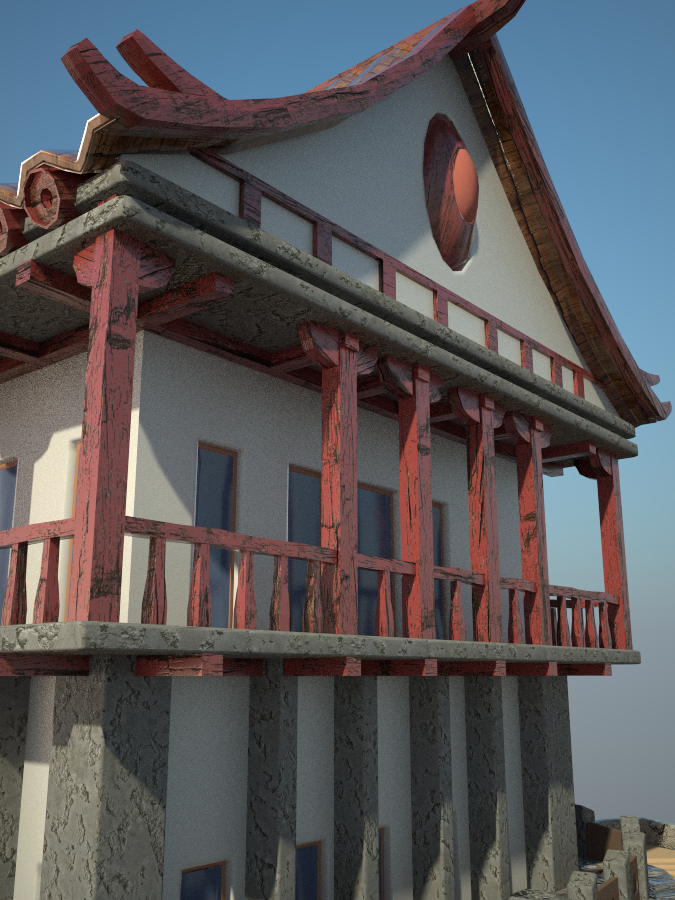
Bias: 24
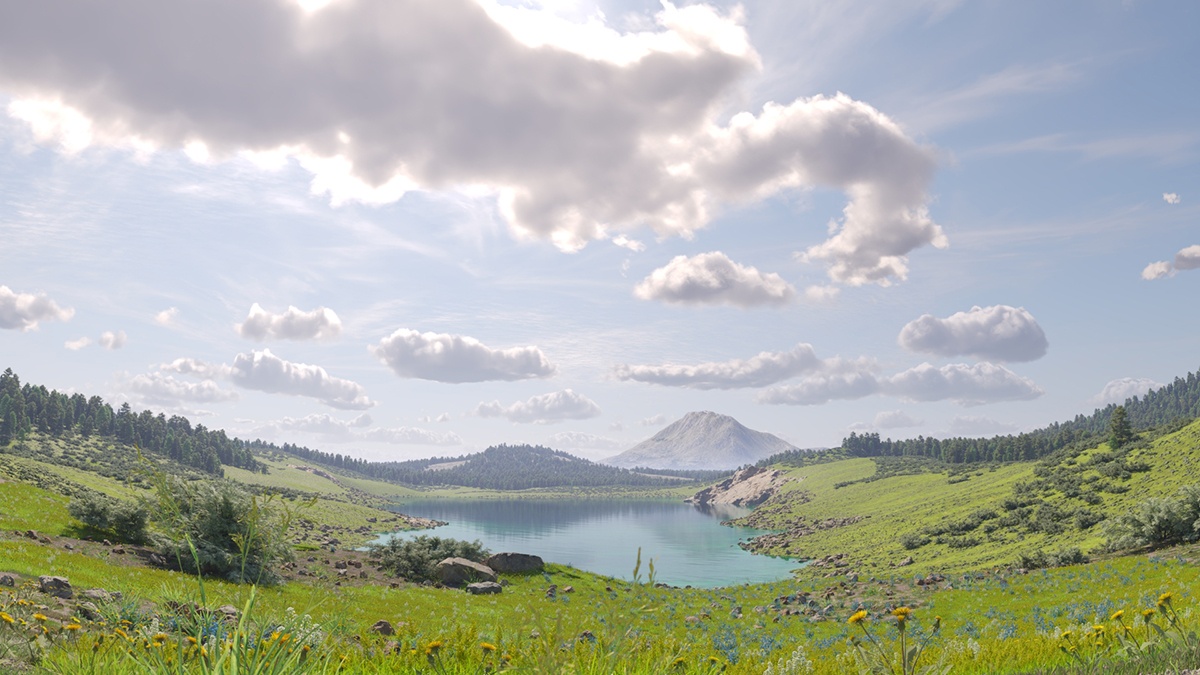
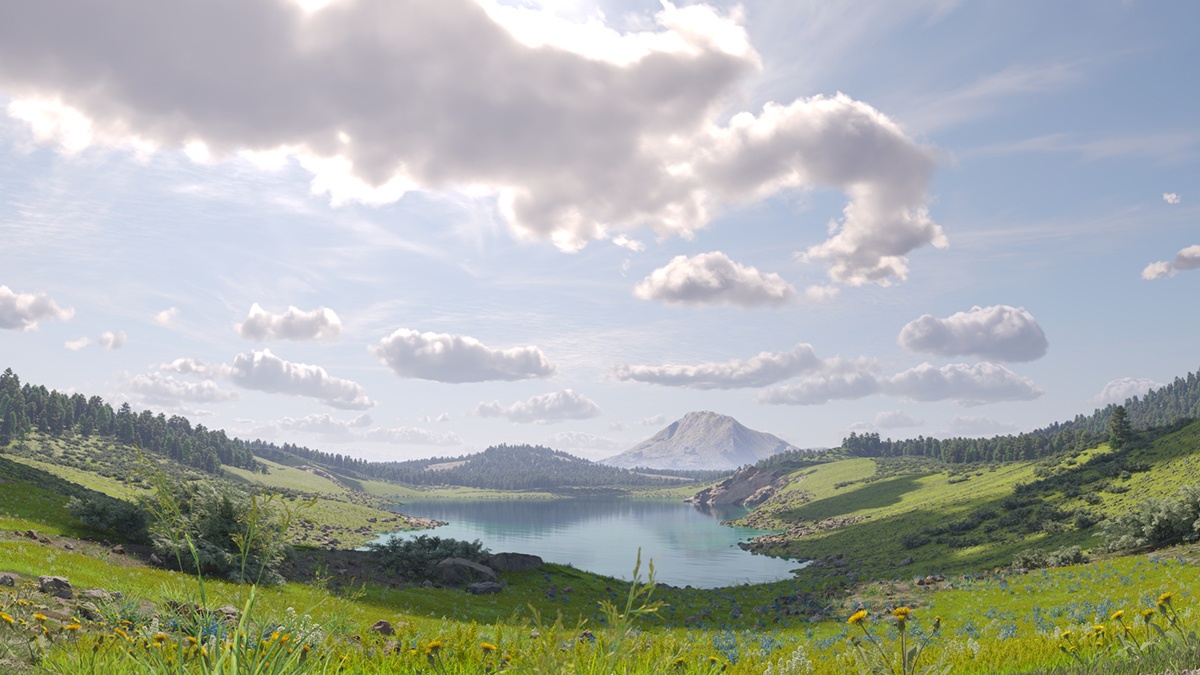
Example: Ground Shadows
This example shows the effect of the Ground Shadows option.
Example: Density
The Density parameter controls the amount of clouds in the sky. The higher the value, the higher the amount of clouds appearing in the render.
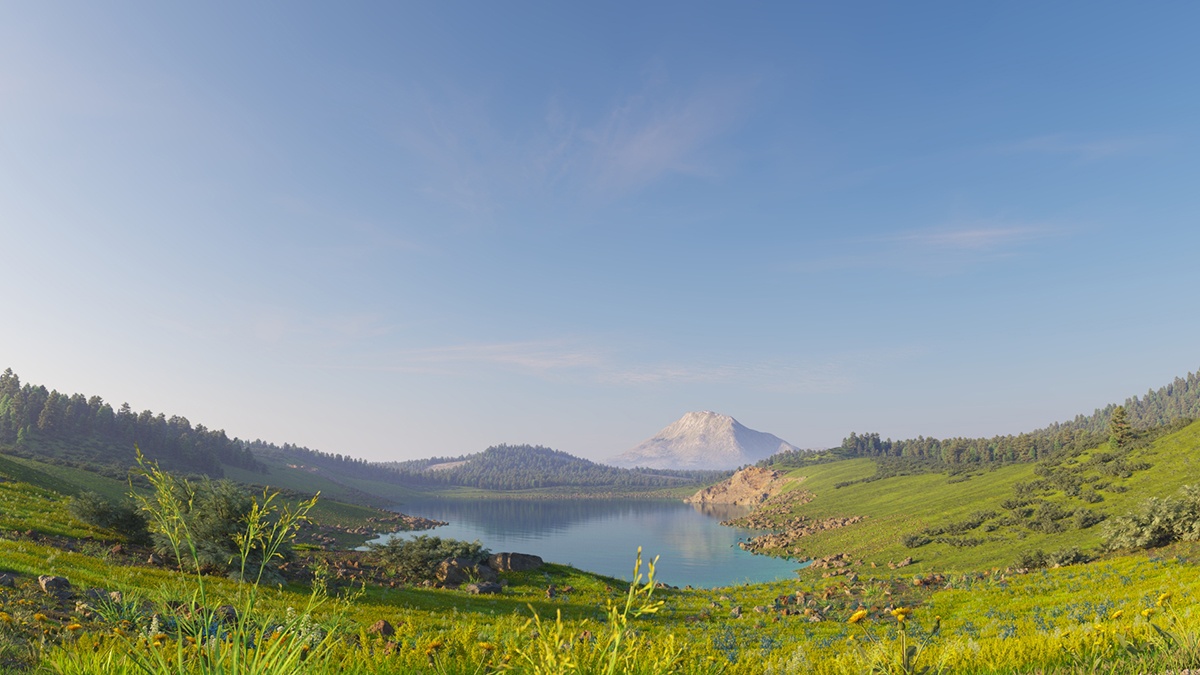
Density = 0
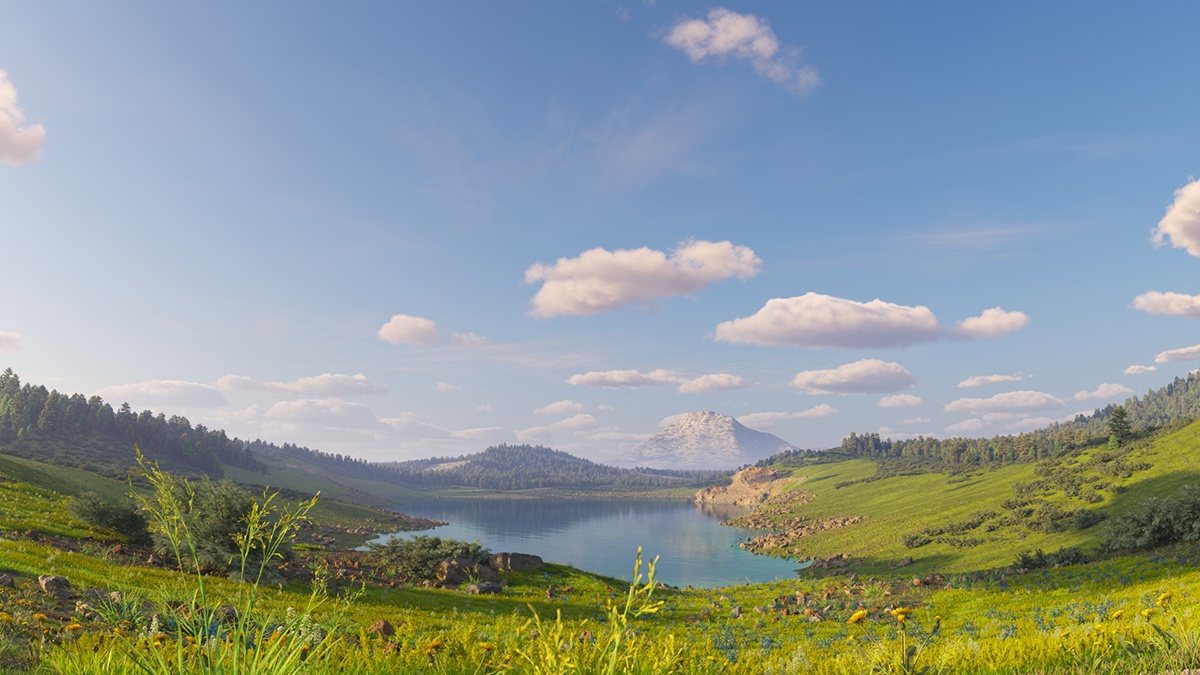
Density = 0.4
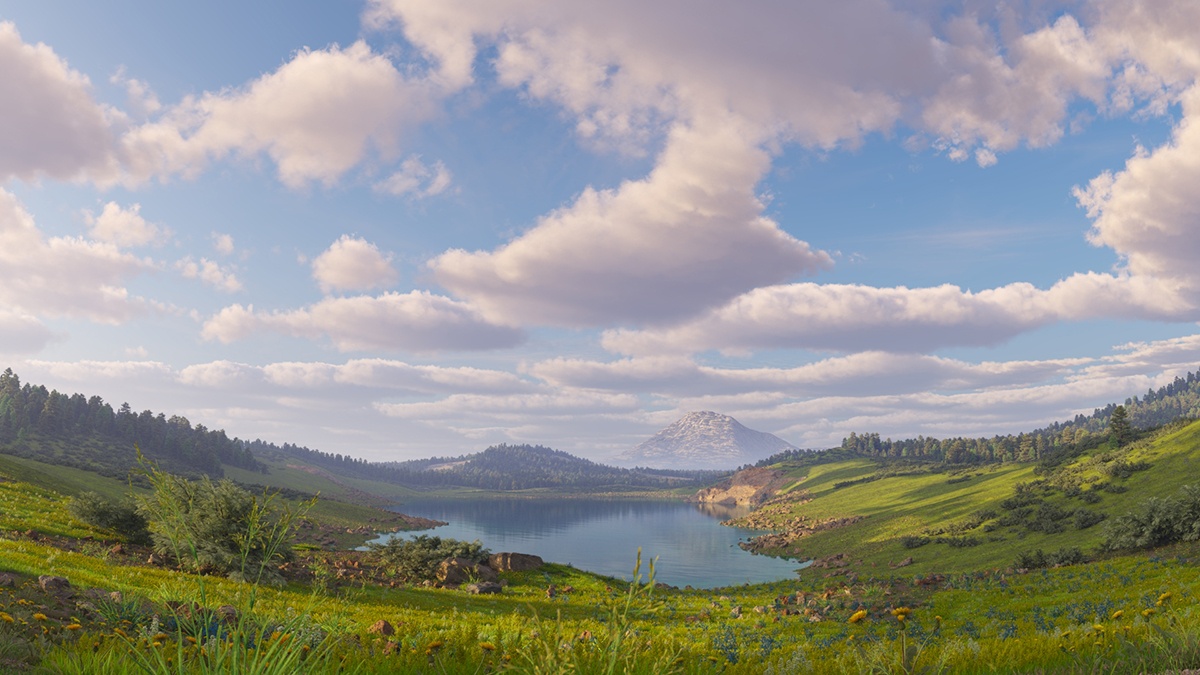
Density = 0.8
Example: Variety
This example shows how the Variety parameter affects the distribution and look of the clouds.
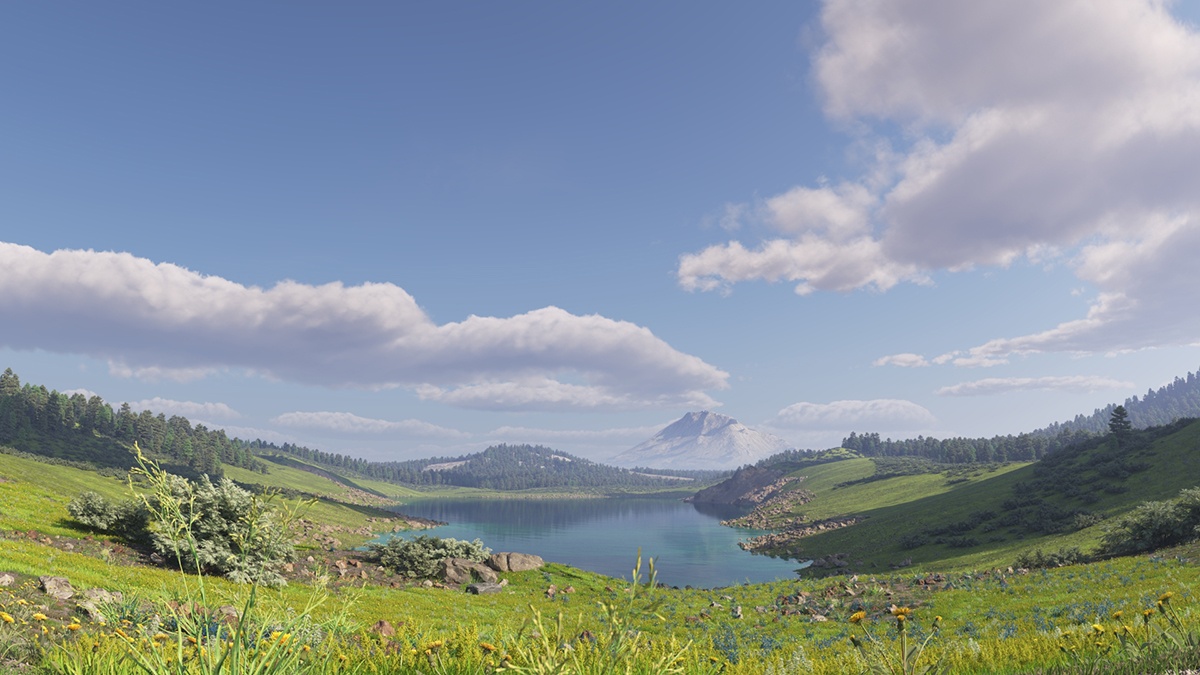
Variety = 0
Variety = 0.5
Variety = 1
Example: Cirrus
This example shows how increasing the Cirrus amount increases the appearance of the cirrus clouds in the render.
Cirrus = 0
Cirrus = 0.5

Cirrus = 1
Example: Longitude and Latitude Offset
This example shows how changing the Longitude and Latitude Offsets affects the appearance of the clouds.
No offset
Longitude Offset = -250, Latitude Offset = 0
Longitude Offset = -250, Latitude Offset = 500
Example: Height
Notice how the clouds change their position in the sky with increasing the Height value.
Height = 500
Height = 1000
Height = 1500
Example: Thickness
The Thickness parameter specifies how full the clouds are. Smaller values make them more thin and sheer, while higher values make them look heavy.
Thickness = 200
Thickness = 500

Thickness = 800
Example: Number of Contrails
Note that the contrails are spread randomly across the sky. In most cases, the camera does not capture all of the contrails.
Number of contrails = 5

Number of contrails = 20

Number of contrails = 40
Example: Contrails Strength
This example shows how the strength parameter makes the contrails more visible and prominent in the sky.

Strength = 0.1

Strength = 0.5

Strength = 1.0
Example: Contrails Distortion
The Distortion parameter is used to achieve some variety in the trace line. Move the slider to see the example renders.

Distortion = 0.1

Distortion = 0.5
Distortion = 1.0
Example: Contrails Offset
The Contrails offset option introduces an offset along the X (Longitude) or Y (Latitude) direction in the sky. Move the slider to see the example renders.

Offset Longitude = 0, Latitude = 0

Offset Longitude = 5000, Latitude = 0
Offset Longitude = 0, Latitude = 5000
Example: Contrails Time
The frames in this animation show the Contrails time parameter with values ranging between 0 and 2.0, with a step of 0.2.

Notes
- By default, the VRaySun and VRaySky are very bright. In the real world, the average solar irradiance is about 1000 W/m^2 (see the references below). Since the image output in V-Ray is in W/m^2/sr, you will typically find that the average RGB values produced by the sun and the sky are about 200.0-300.0 units. This is quite correct from a physical point of view, but is not enough for a nice image. You can either use Color Mapping to bring these values to a smaller range (which is the preferred way), or you can use the Sun's Intensity multiplier to make the sun and sky less bright. Using the V-Ray Physical Camera with suitable values also produces a correct result without changing the sun and sky parameters.
References
Here is a list of references about the V-Ray Sun and Sky implementation, as well as general information about the illumination of the Sun.
- A.J. Preetham, P. Shirley, and B. Smits, A Practical Analytic Model for Daylight, SIGGRAPH 1999, Computer Graphics Proceedings;
An online version can be found at https://courses.cs.duke.edu/cps124/spring08/assign/07_papers/.
This paper includes source code examples and is the base for the VRaySun and VRaySky plugins. - [2] R. H. B. Exell, The intensity of solar radiation, 2000
This page is available at https://www.jgsee.kmutt.ac.th/exell/IntensitySolarRad.pdf (Please note that this link is no longer valid).
This document contains information about the average intensity of the solar radiation, as well as some specific measurements. - [3] R. Cahalan, Sun & Earth Radiation
This page can be found at http://climate.gsfc.nasa.gov/static/cahalan/Radiation/ (Please note that this link is no longer valid).
These pages contain a list of accurate solar irradiances across a large portion of the electromagnetic spectrum. - [4] D. Robinson-Boonstra, Venus Transit: Activity 3, Sun & Earth Day 2004
This document can be found online at
http://sunearth.gsfc.nasa.gov/sunearthday/2004/2004images/VT_Activity3.pdf (Please note that this link is no longer valid).
Among other things, this document gives the distance from the Sun to the Earth and the size of the Sun derived from astronomic observations. - [5] Hosek L, et al, An Analytic Model for Full Spectral Sky-Dome Radiance
This document can be found online at
http://cgg.mff.cuni.cz/projects/SkylightModelling/HosekWilkie_SkylightModel_SIGGRAPH2012_Preprint_lowres.pdf
Describes the Hosek sky model used by the VRaySun and VRaySky